Drawing Black and White Pictures
In the age of black-and-white photography, people still wanted to immortalize their memories in color. In the absence of a way to take color photos, photo studios and artists added hues to images through different processes like tinting and dyeing. People used brushes and even their fingers to add paints and oils to photos. This process is surprisingly not that different from the one we use to create this effect today, even when editing with contemporary design software.
Adding color to photos has long been, and still is, a manual art. The difference is that when you colorize a digital image in the 21st century, you dip your finger in digital rather than physical paint. However, you still make selections by drawing outlines on your phone screen, much as one would have painted directly onto an image in the analog age. Today's process might be a bit less messy, but it feels artful. It's a way of altering an image that still feels fresh even if the process itself is tried and true. What's more, you're fully in control of the final result.
Modern filters help aid the process along. That is, once you've taken the time to paint color onto a black-and-white digital photo carefully, you can give some nuance to the look by using a filter that tilts the shades into warmer or cooler territories. This approach allows for color to be both expressive and expressionist. While it might not look hyper-real, your edited image will look like an update of an already great photo instead of a brand new one. Alternatively, you can add futuristic effects that abstract your vision, turning a black-and-white image into the kind of avant-garde graphic art that only modern computers can make.
Why spend so much time, effort, and care colorizing a photo? First, it is a way to bring life back into old photographs. You can scan important, nostalgic images from the past, edit them, and share them with your family. Secondly, shifting the hues of any composition makes for a fun effect. After mastering this digital process, you'll be able to leave certain parts of a photo in grayscale while adding colorful emphasis to focal points.
In Living Color
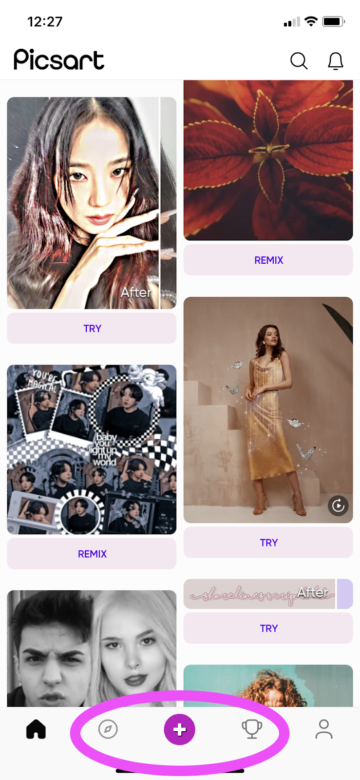
- Open the Picsart mobile application and click on the purple plus sign at the bottom of the screen to start a new project. Your photo library will appear. Choose the image you wish to colorize.
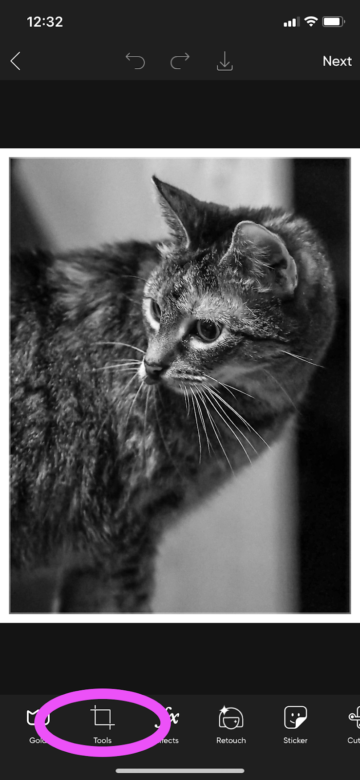
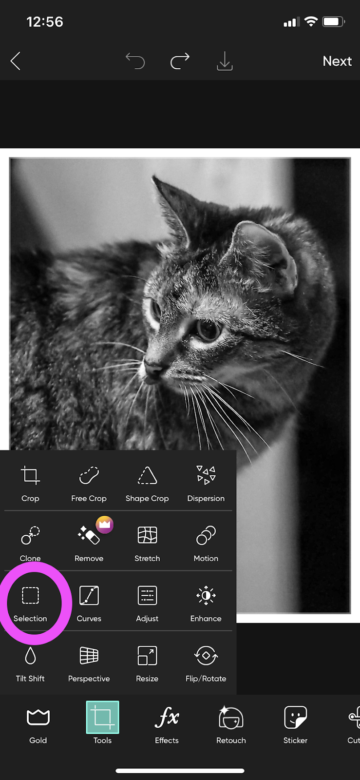
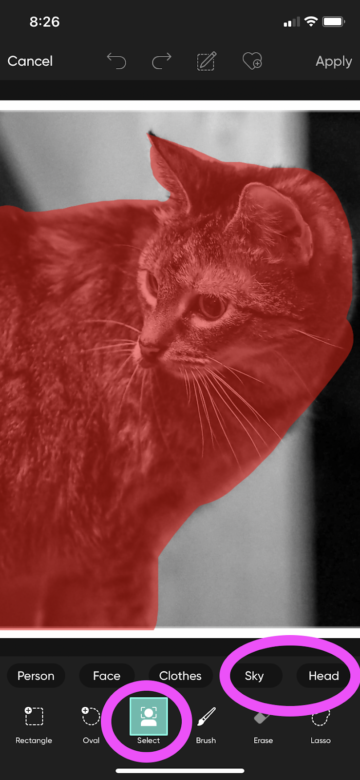
2. With the black-and-white photograph on the editing screen, choose the "Tools" function from the menu at the bottom of the screen. A pop-up menu will appear. Choose "Selection."
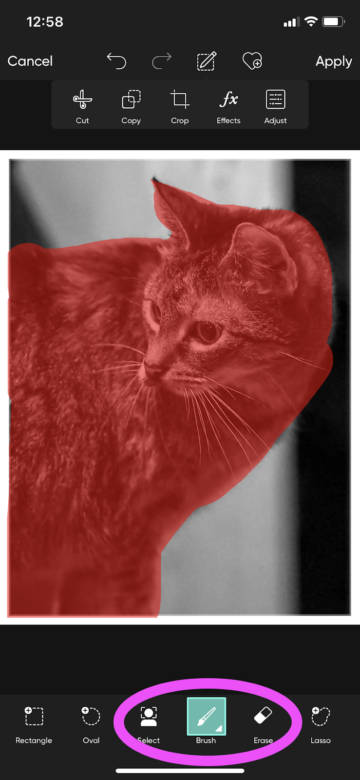
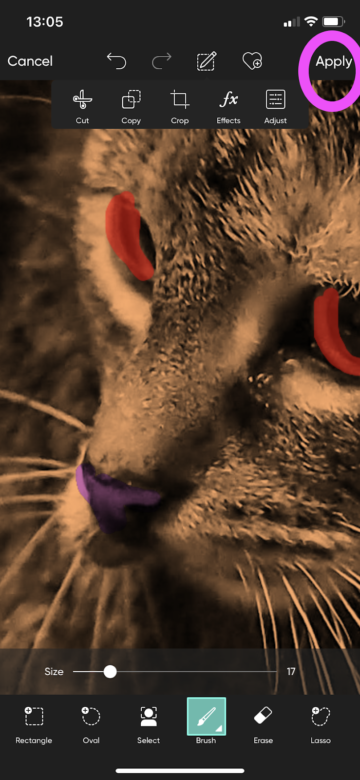
3. Now, use the "Brush" tool to define the first area you wish to colorize. Keep in mind that you have to work section by section, just as if you were doing a paint-by-number activity. So, if you want to make all the fur on a cat one color, you can go ahead and highlight the entire area in this step.
Before drawing on your photo with the selection brush, adjust the tooltip's size to make getting around curves and hard-to-reach details easier. You can do this by clicking on the small white arrow in the corner of the "Brush" icon and adjusting the "Size" slider.
Pro Tip: If your image has easily recognizable features that you want to turn all one color (think: faces, sky, etc.), you can use our ready-made AI "Select" tool for a helping hand.
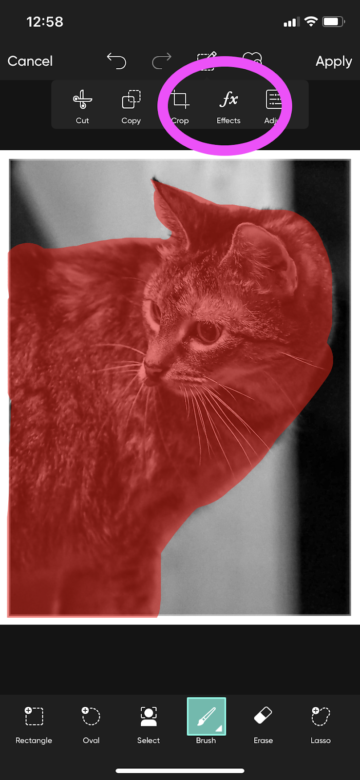
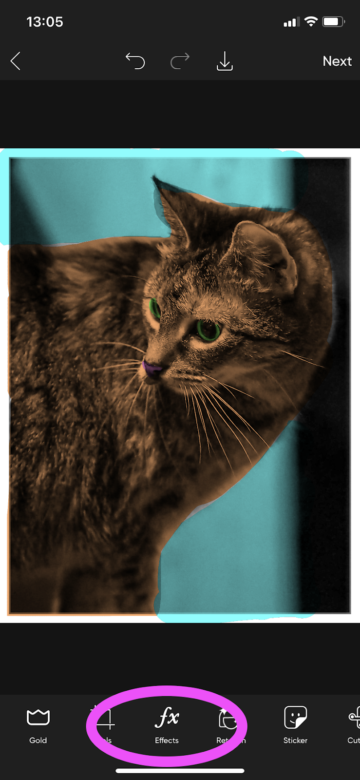
4. Once you fill in the area(s) you wish to colorize in this first hue, choose "FX" from the toolbar above your canvas.
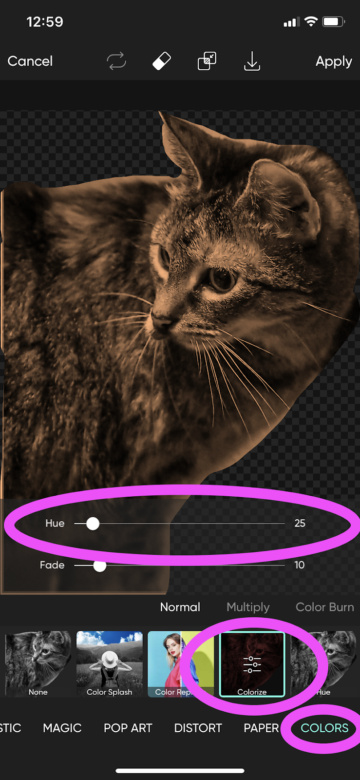
5. Scroll along the menu at the bottom of the screen until you find the word "Colors" and click on it. Doing so narrows down the filters to only those that affect hue choices in the selected area. Choose the "Colorize" function and play around with the "Hue" slider until you land on the right shade. The colors on this slider include vibrant greens , bold purples , and rich blues . And Don't worry if the tonality isn't quite right because you can shift the intensity and brightness of the colors in the photo later using other filters.
6. Repeat steps three through six for every color selection in your composition. When you are satisfied with your results, select "Apply" in the upper right-hand corner of the screen, and get ready to have some fun with filters.

7. Now, choose the "FX" icon from the menu at the bottom of the screen. This will bring up our wide selection of filters.
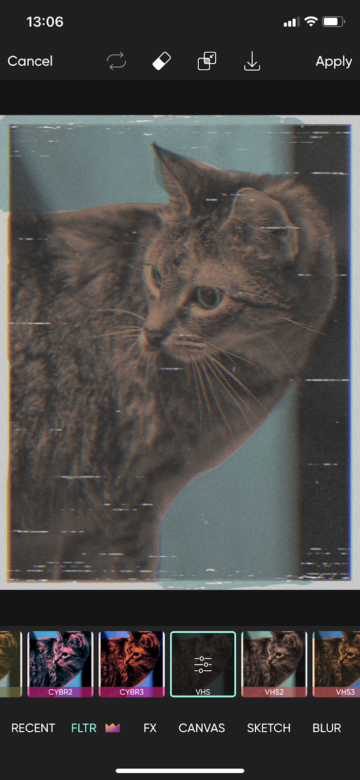
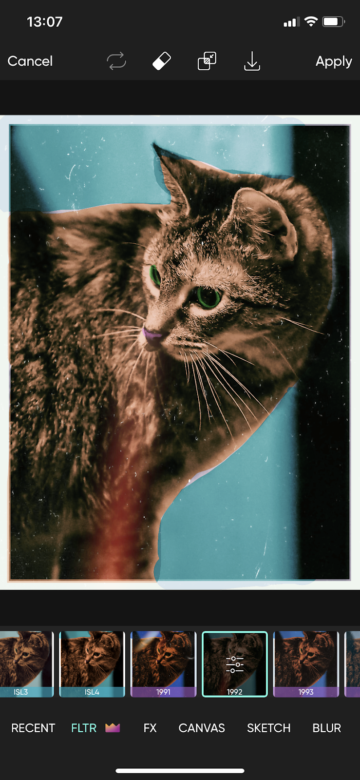
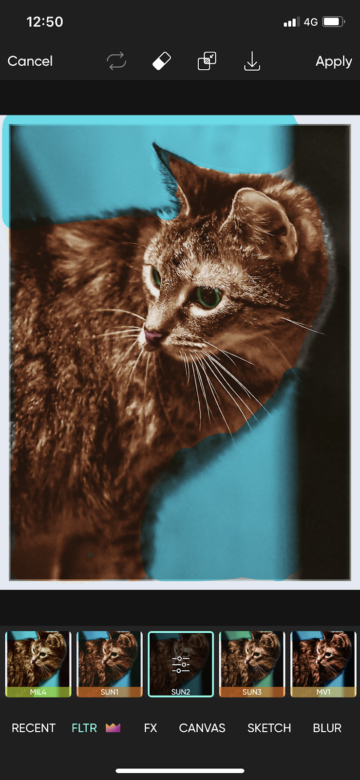
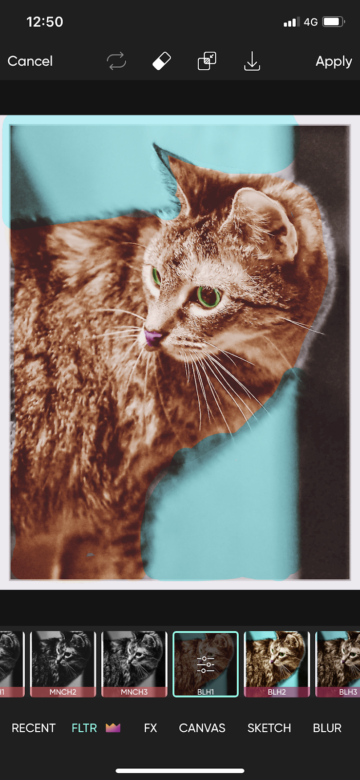
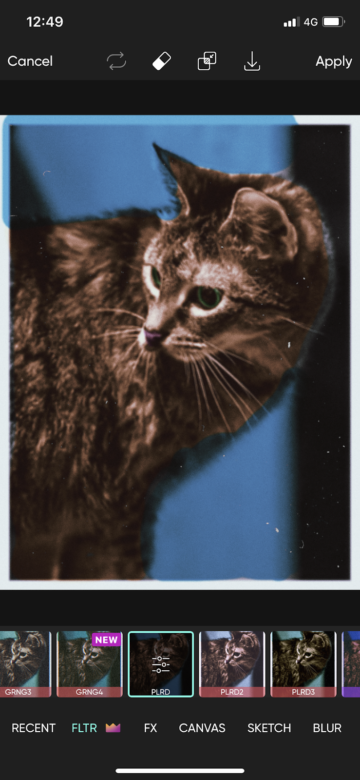
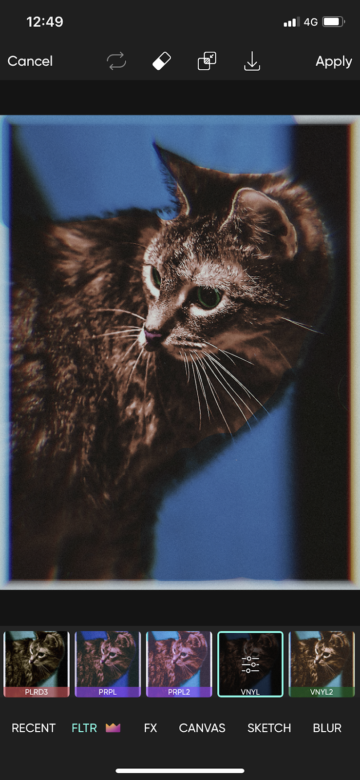
8. Narrow the effects down by tapping on the "FLTR" category at the bottom of the screen. Scroll through the miniatures of the filters to find ones that approximate the color scheme you were going for. Don't be shy about trying them out. Nothing is ever permanent until you hit the "Apply" button, and even so, you can always use the back arrow at the top of the screen to undo your last step. We recommend filters like "VHS" and "1992" to preserve a vintage look in your photo. If you want something bolder, try out "SUN2" and "BLH1." For a cooler palette, opt for "VNYL" or "PLRD."
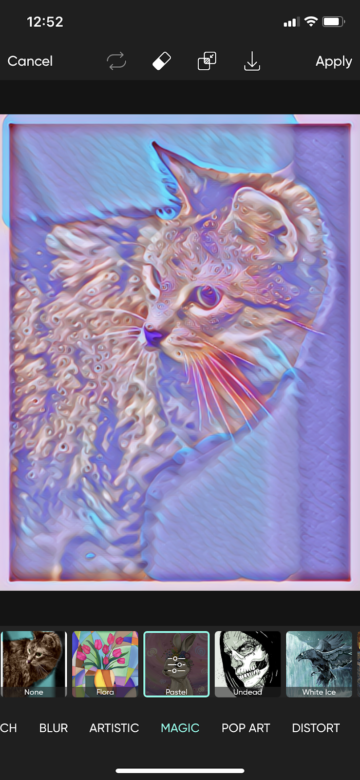
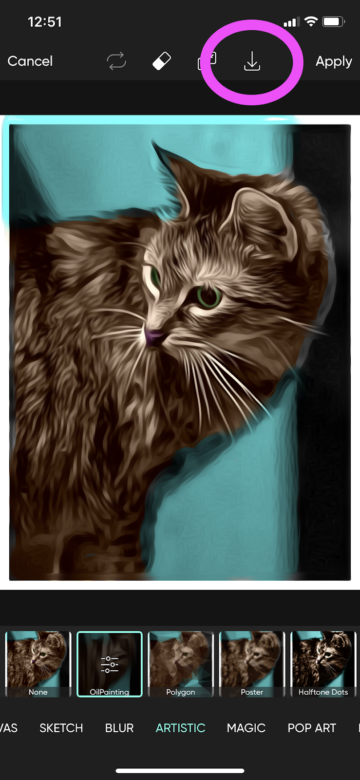
9. If you want to make your masterpiece look more like a painting than a photo, explore the funky filters housed in the "ARTISTIC" and "MAGIC" categories. For Van-Gogh-esque brush strokes, try out the "Oil Painting" filter from the former category; for a kitschy, futuristic effect, try out "Pastel" from the latter.

10. When you're happy with your composition, share it with your loved ones and followers by downloading your image to your phone or using our quick-share options for easy social media uploading. Simply click on the downward arrow icon at the top of the screen, and save the photo to your image library. You can then share it on your favorite social media channels directly from the Picsart dashboard.
Create at the Speed of Culture
Picsart is a full ecosystem of free-to-use content, powerful tools, and creator inspiration. With a billion downloads and more than 150 million monthly active creators, Picsart isn't just the world's largest creative platform; we're also the fastest growing. Picsart has collaborated with major artists and brands like BLACKPINK, the Jonas Brothers, Lizzo, Sanrio: Hello Kitty, I am a Voter, Bebe Rexha, Maroon 5, One Direction, Warner Bros. Entertainment, iHeartMedia, Condé Nast, and more. Download the app or start editing on web today to enhance your photos and videos with thousands of quick and easy editing tools, trendy filters, fun stickers, and brilliant backgrounds. Unleash your creativity and upgrade to Gold for premium perks!
Drawing Black and White Pictures
Source: https://picsart.com/blog/post/how-to-add-color-to-black-white-images
0 Response to "Drawing Black and White Pictures"
Post a Comment