How to Recover Replaced Word File in Windows 10

We save files to our Windows machine all of the time on a daily basis. We create documents, edit spreadsheets, edit pictures, and make changes to all sorts of data.
When going to save a file, we may accidentally save over another file, and erase work that was important to us or that took a long time for us to complete. This can be frustrating and can set us back on a deadline that we may be trying to meet.
The good news is that the file may still be there, it's just not visible to us. When you save over a file, the data is replaced, but it can still be recovered. In this article, we're going to take a look at how to recover overwritten files. There are multiple ways to recover overwritten files in Windows 10, so if one isn't working for you be sure to take a look at the other methods below.
If you notice that you accidentally overwrote a file, it is best to stop using your machine right away. Continuing to use your computer will make it harder to recover the file and will lower the chances of recovering overwritten files.
Method 1: Using Software to Recover Overwritten Files
An overwritten file can be defined in two ways. The first way is when a file has been saved over and replaced, in this case, data recovery software most likely will not be able to recover the file. However, if you add a new file with the same name, this type of file would be overwritten, but only the path has been changed and the file should be recoverable. I recently just used Disk Drill to recover some photos and it did a very good job at finding photos that I had deleted.
Disk Drill will allow you to recover files on your Windows machine. The software works by scanning your Windows machine and looks for files that can be recovered. When you delete a file or make a change to it, the file isn't necessarily removed from your computer but is instead marked as free space. Due to this, data recovery software may be able to recover the file.
Step 1. Download and install Disk Drill for your computer.
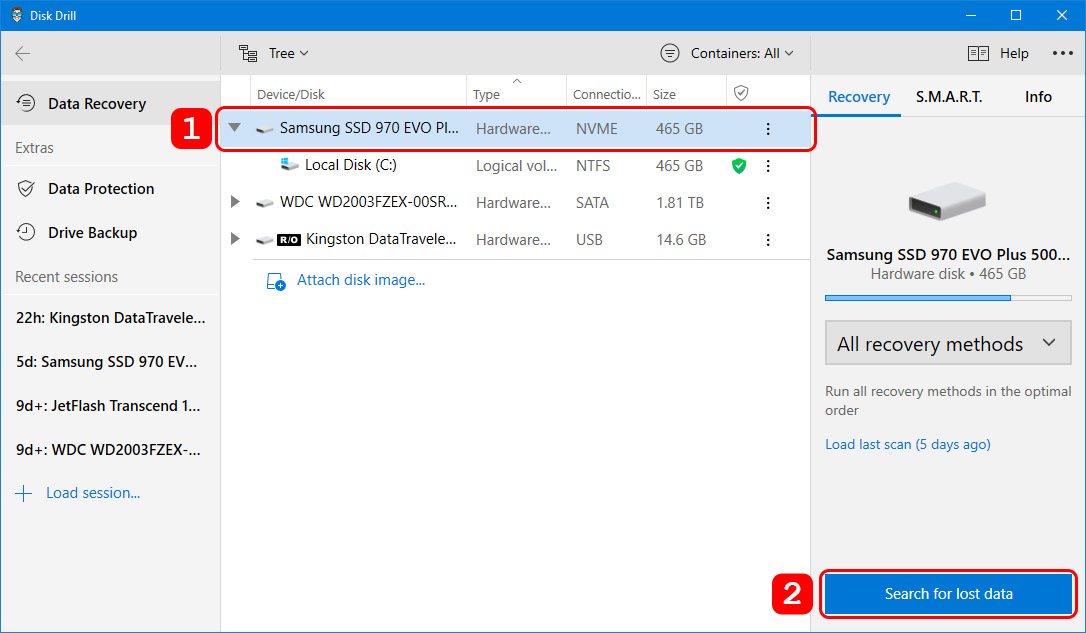
Step 2. Select the Device/Disk that you would like to scan for the overwritten files and then click on the Search for lost data button in the lower right-hand corner.
Step 3. Wait for the scanning process to complete.
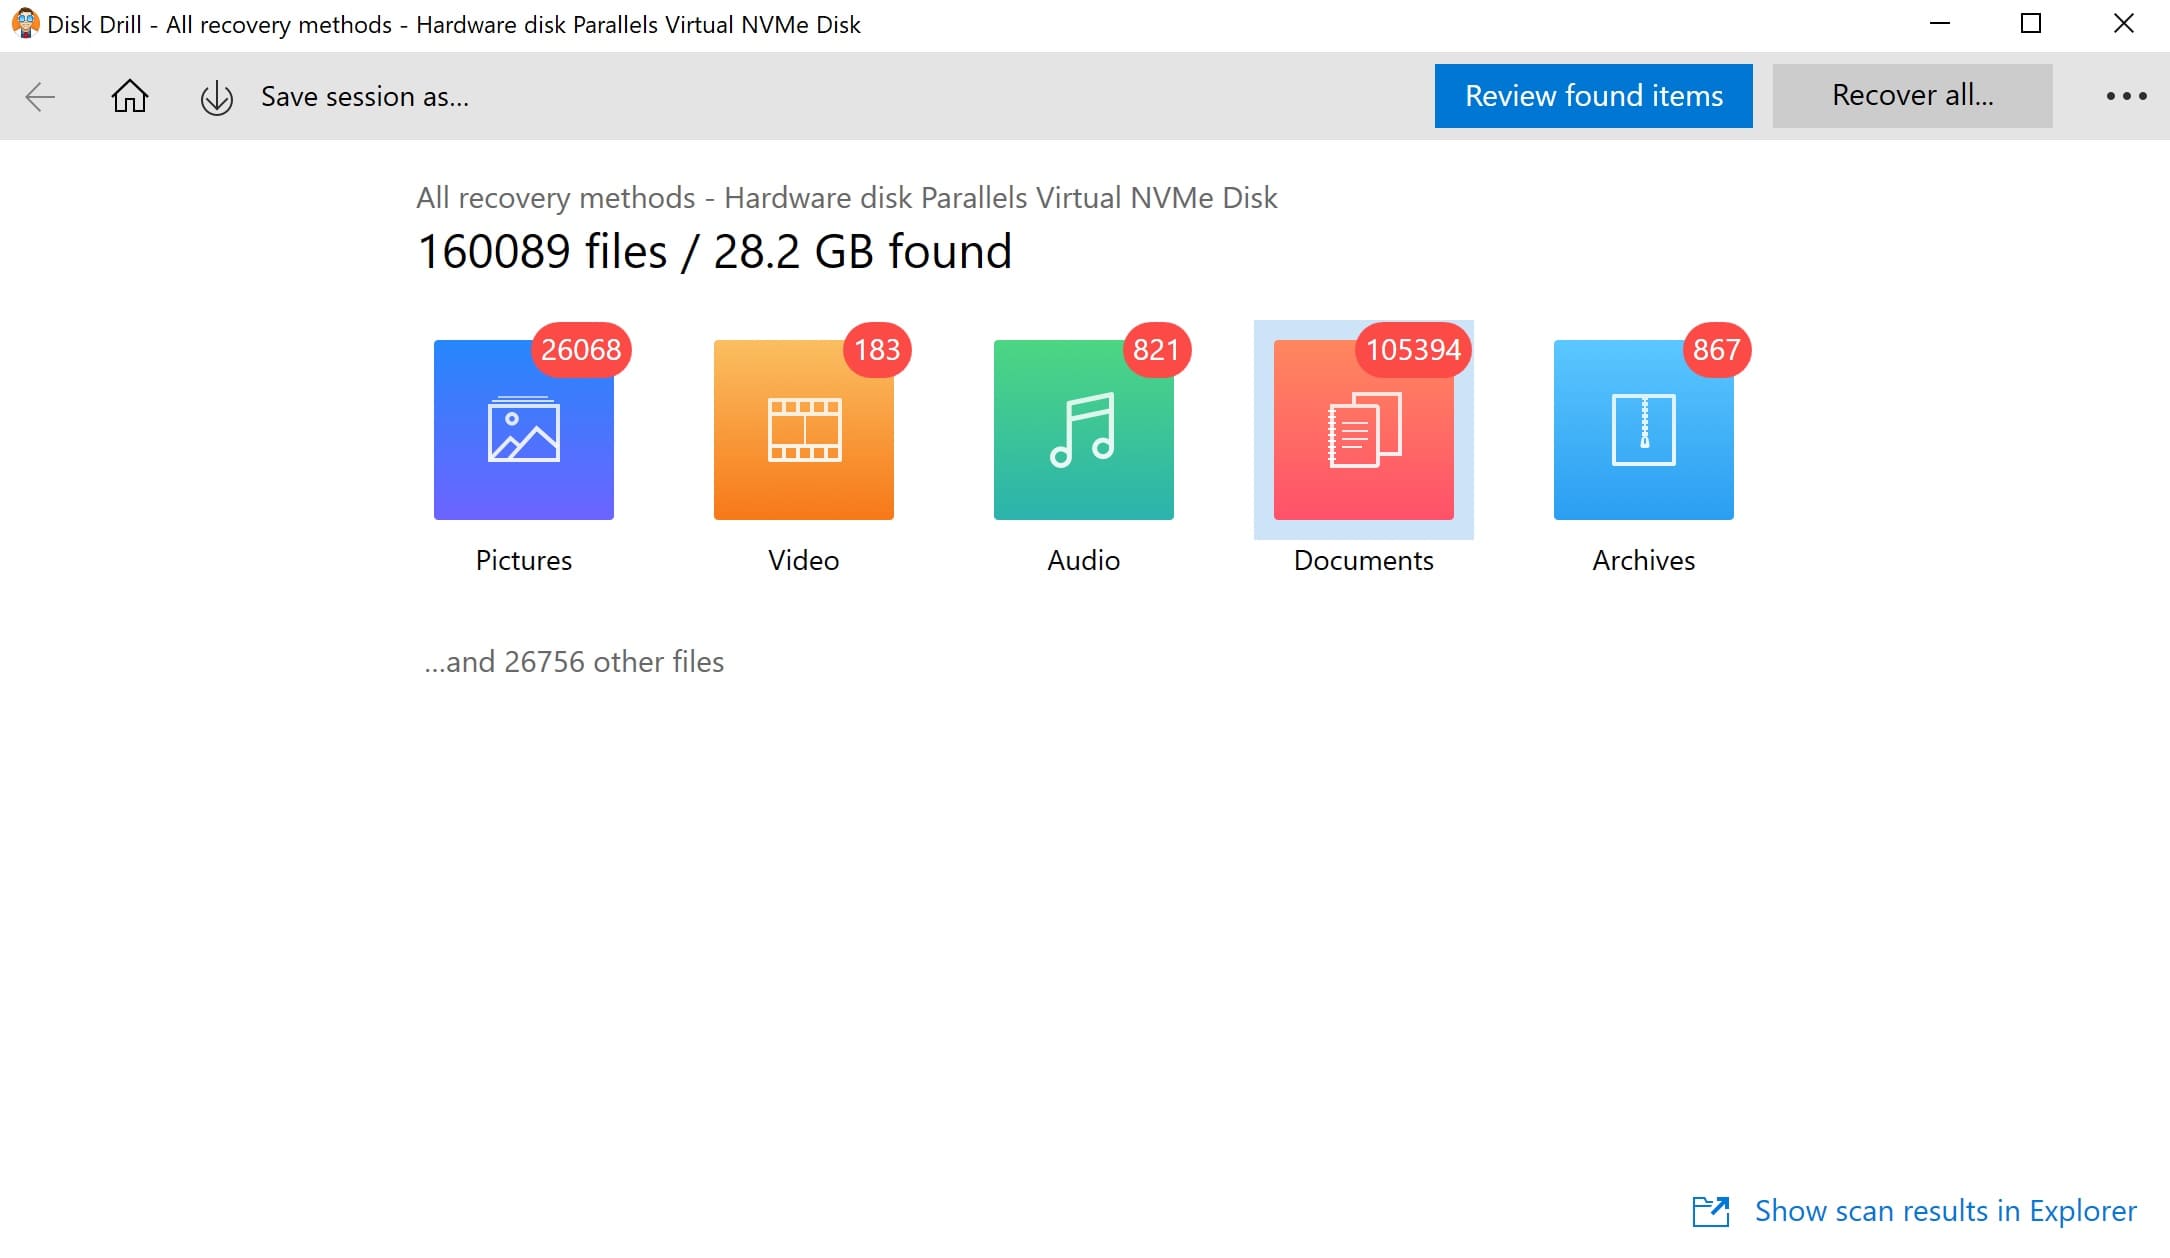
Step 4. After the scan has completed, you will be greeted by all of the found files that Disk Drill was able to recover.
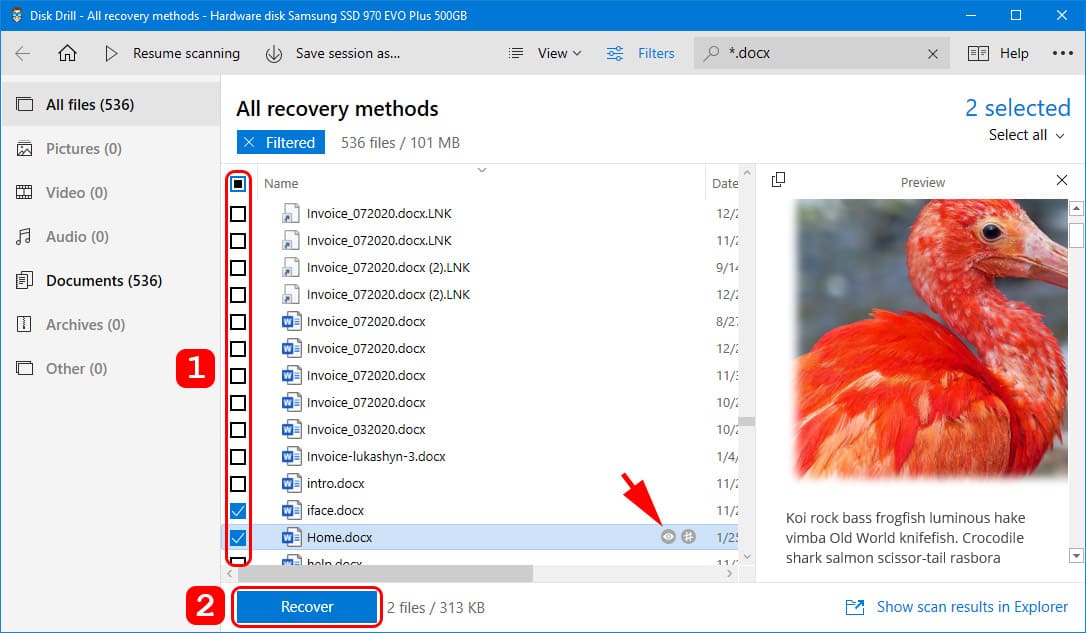
Step 5. Check the files that you would like to recover and then choose recover.
Step 6. Choose a path for Disk Drill to recover the files to.
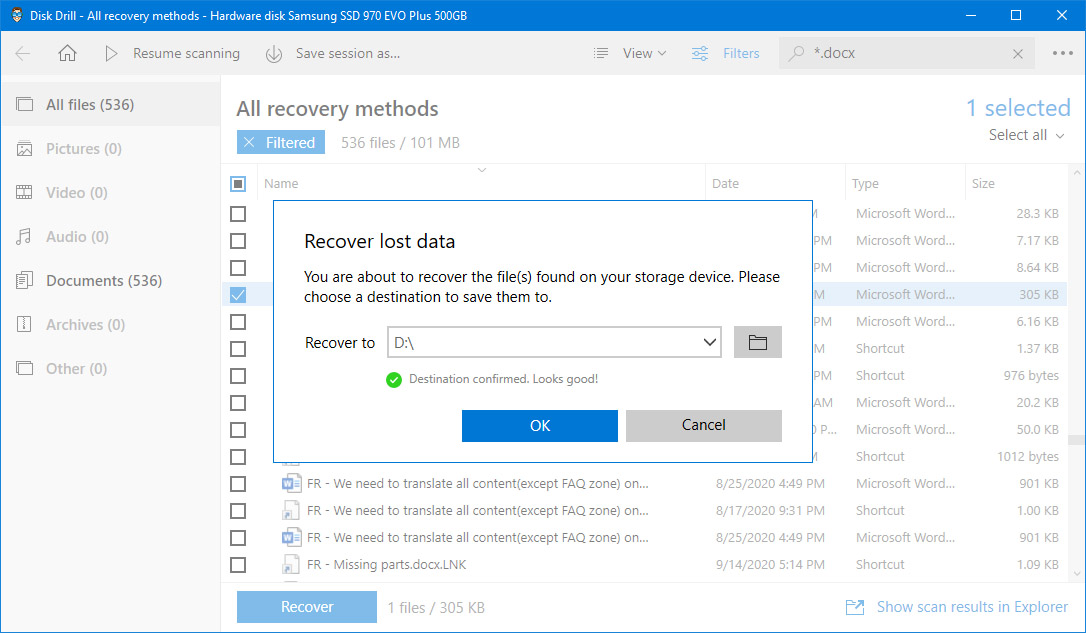
Step 7. You will then be greeted by a confirmation message letting you know that the recovery was successful.
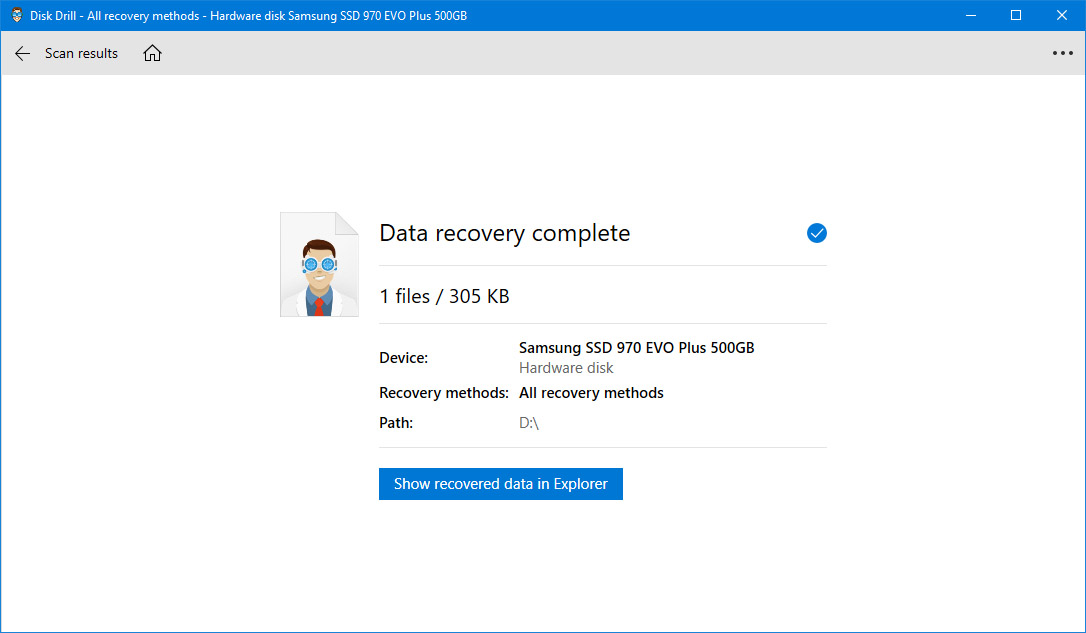
While I choose to recover Word files in this example, recovering other types of data can be accomplished in the same way as shown from the steps above.
It is important that you if you recognize that the file is no longer there that you stop using your machine as adding new files can make it impossible to recover the file. This is due to new data being saved to your machine that can overwrite the data that we're trying to recover. Installing Disk Drill on an external device will improve your chances of successful data recovery.
Method 2: Recovering Overwritten Files on Windows 10 Using Previous Versions
Previous versions are copies of files that Windows creates as part of a backup or as a restore point. Windows does this automatically for you and this is a feature that is built right into the operating system.
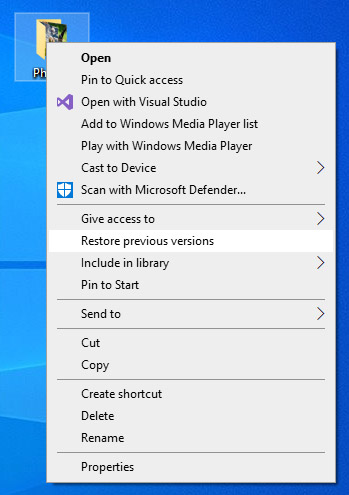
If you have modified a folder or file, sometimes you can right-click on it and restore it back to a previous version which, would allow you to recover replaced files should you accidentally overwrite one.
Step 1. Find the folder or file that you want to restore to a previous version of.
Step 2. Right-click on the file or folder and select Restore previous versions.
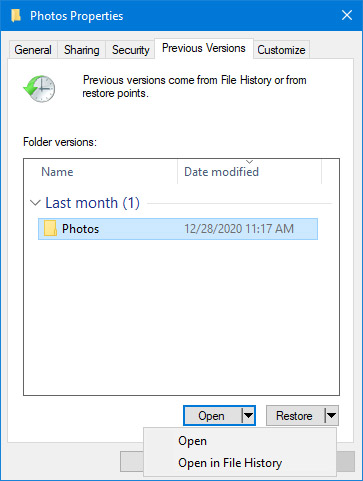
Step 3. You will then be greeted by a window that will list all of the previous versions that are available to you from within that app. If you have some, they will show up here. Select Open if you would like to view it beforehand to ensure you're recovering the correct version of the overwritten file.
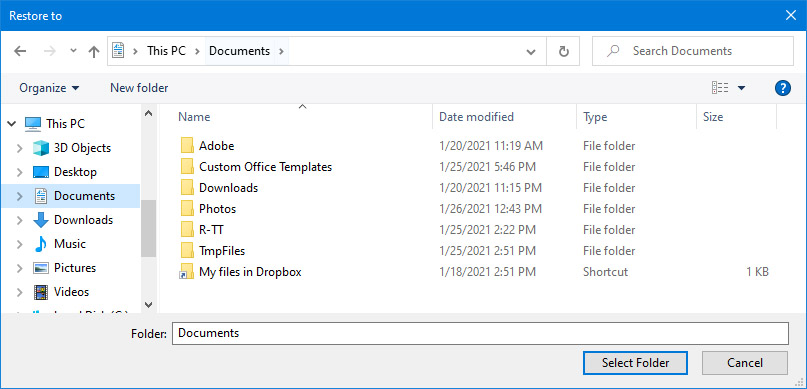
Step 4. Then, select the Restore To… option after you have confirmed that this is the correct folder or file.
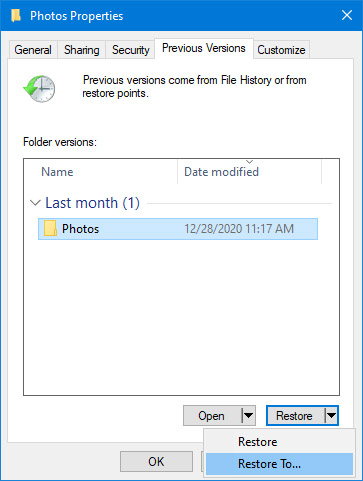
Step 5. Lastly, choose a location to restore the overwritten folder or file to.
That's it! Being able to restore to a previous version is handy as it doesn't require you to set anything up ahead of time. Windows is doing this for you automatically as you use your machine.
Method 3: How to Recover Overwritten Files on Windows 10 From a Backup
If you back up your Windows machine to an external hard drive, then you can recover overwritten files from there. This would be a drive that you plug into your machine or a wireless hard drive that your computer has access to.
Recovering overwritten files from a hard disk is a much more reliable method as this will encompass all of the files that you have on your Windows computer, it isn't limited to a per app basis.
Step 1. Launch Settings > Update & Security > Backup.
Step 2. If you have a backup set up, it will appear here. You can then restore your files back onto your machine.
If you don't see a backup showing up by following the steps above, I would highly recommend that you set one up and back up your computer on the regular. No one thinks that data loss is going to happen to them and it's best to be prepared.
Method 4: How to Recover Word and Excel Files Using AutoRecover
Both Word and Excel come with a feature that will create recoverable backups that you can specify to be created using different time intervals of your choosing.
This is a handy feature as then you don't have to worry about clicking the Save button, your work will automatically save at the time interval that you have selected. This setting is turned on by default so your work may have been saved.
Keep in mind, this does not replace saving your work manually as AutoRecover is done in time intervals. It is still important to save your work in addition to having this as another method.
Microsoft Office also comes with a cloud feature that will save your work every time that you make a change automatically if you don't mind having your information stored on the cloud.
Step 1. Launch Word or Excel.
Step 2. Go to the navbar and choose File > Option > Save.
Step 3. Within this window, you can find the AutoRecover location for where your files are being saved to. You can also see how often AutoRecover is saving your work for you. You can note on mine, that it is saving every 10 minutes and that this is the default setting.
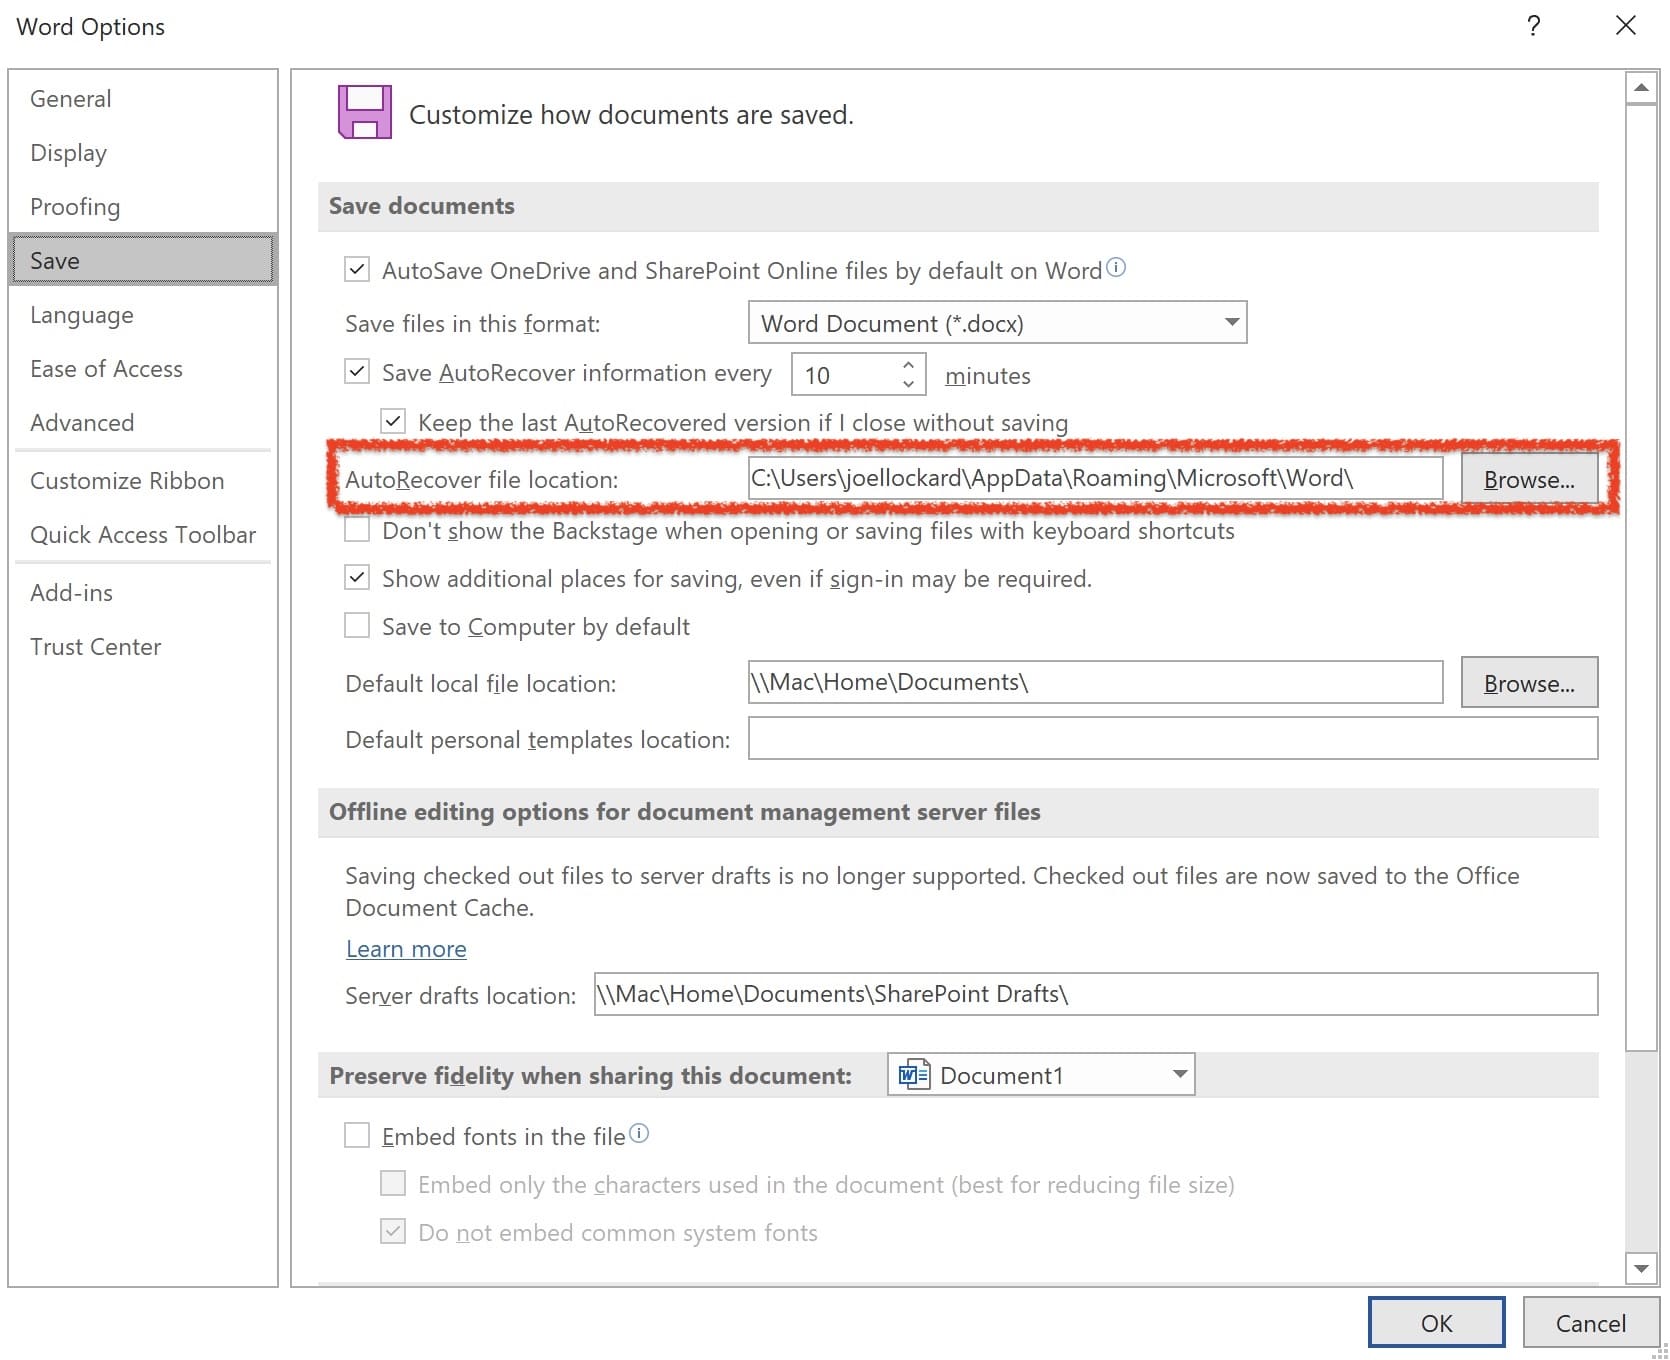
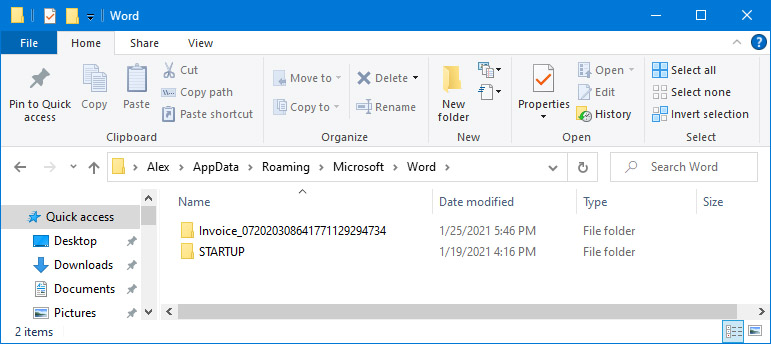
Step 4. Click on the Browse option to search through your recoverable files. When you click "Browse", it will be a dialog box for selecting the auto-recovery folder initially, but not for opening documents from there. You can simply follow this path and then search for folders to locate your files. Find the file that you would like to recover and click OK to retrieve overwritten files.
FAQ
When you overwrite a file, the data associated with it is marked as free for your computer to then save new data to. This is what allows us to recover data in the steps above. The longer that you wait to try and recover the overwritten file, the less of a chance that you will have at being able to.
Disk Drill can recover files from external devices such as external hard drives and USB thumb drives. Simply follow the steps above that reference data recovery with Disk Drill, but scan your USB thumb drive instead. You will be able to take a look at the data that Disk Drill was able to recover and choose what you would like to restore back onto your Windows machine.
Programs such as Word and Excel have built-in undo functions that allow you to undo previous actions that were taken. If you accidentally delete all of your text or numbers you can use the keyboard shortcut "Ctrl + Z" without the quotation marks to undo the most recent actions. If you have already saved the file, then you will have to most likely use one of the following recovery actions above.
How to Recover Replaced Word File in Windows 10
Source: https://7datarecovery.com/blog/recover-overwritten-files-windows-10/
0 Response to "How to Recover Replaced Word File in Windows 10"
Post a Comment