How to Login to Local Account Windows 7
You can add multiple user accounts to your computer, each with its own password and other settings, or change the settings for your existing accounts. Choose your operating system below and follow the instructions to learn how to add or change accounts.
Windows 10
Windows 7
Windows 10
1. Click the Start button and select the user account at the top of the menu.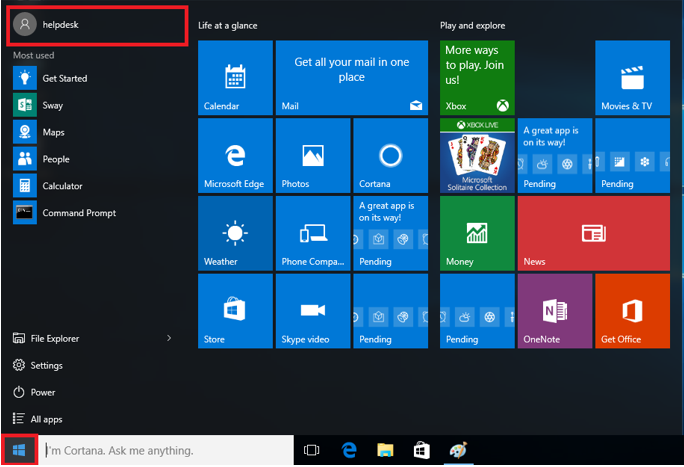
2. Select"Change Account Settings"from the list.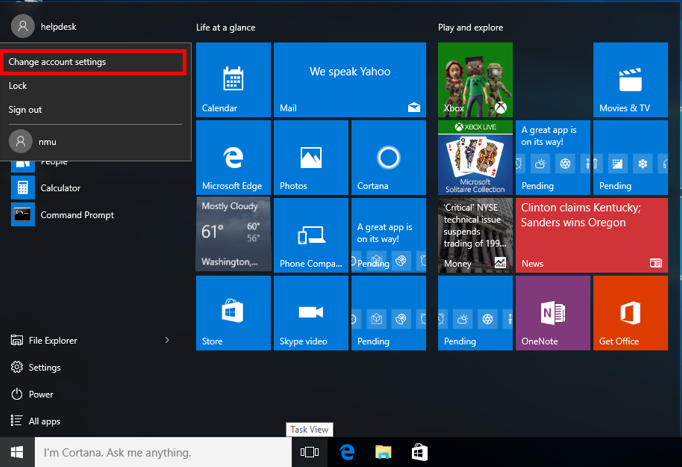
3. From the inital account screen, you can change your account image by selecting the "Browse" button beneath the "Your Picture" bubble and browse your computer for the picture you'd like to use.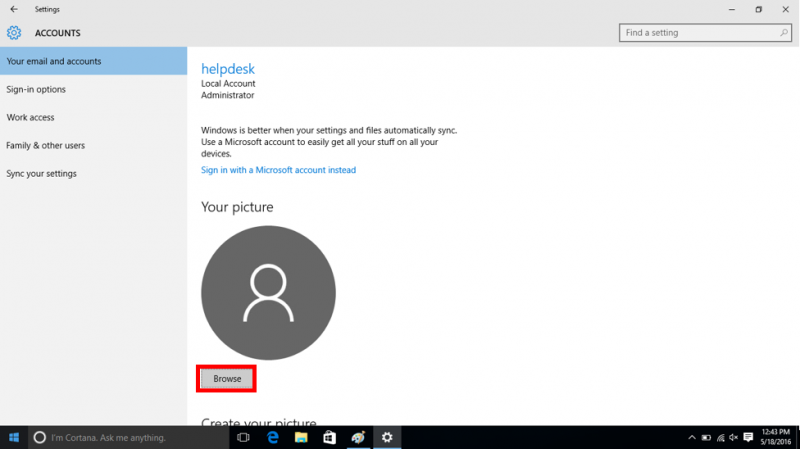
4. To change your account password, select "Sign-in options" from the list on the left side of the screen. This will show you various options for securing access to your computer.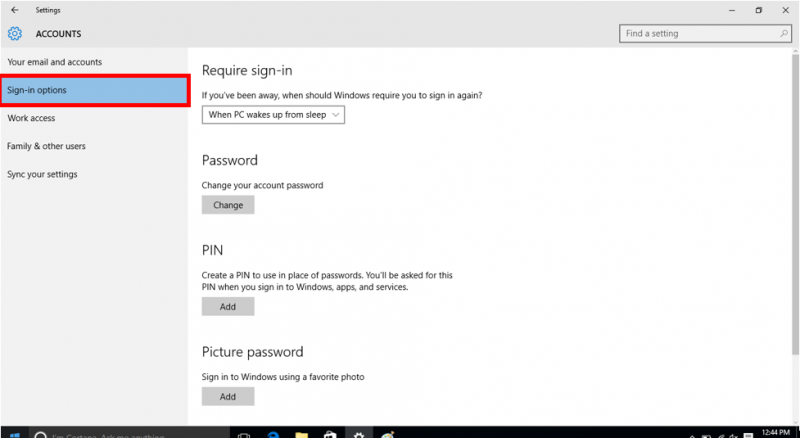
5. To add a new user or to change the account type of an existing user, select "Family & other users from the list on the left. To add a new account, click the "+" next to "Add someone else to this PC." Follow the on-screen instructions.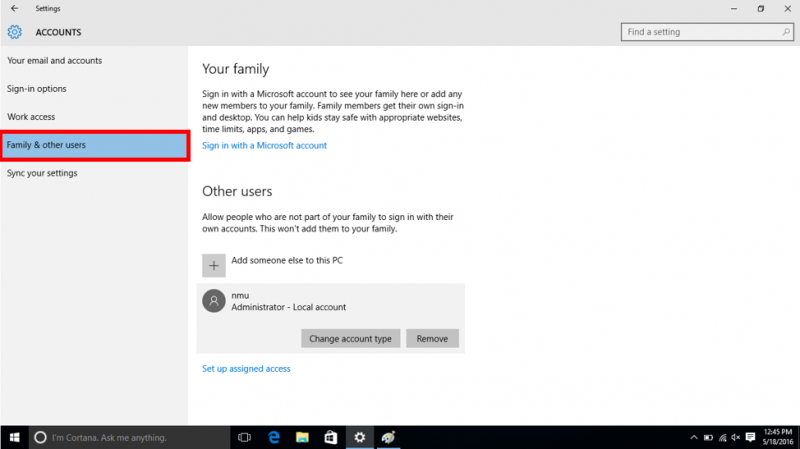
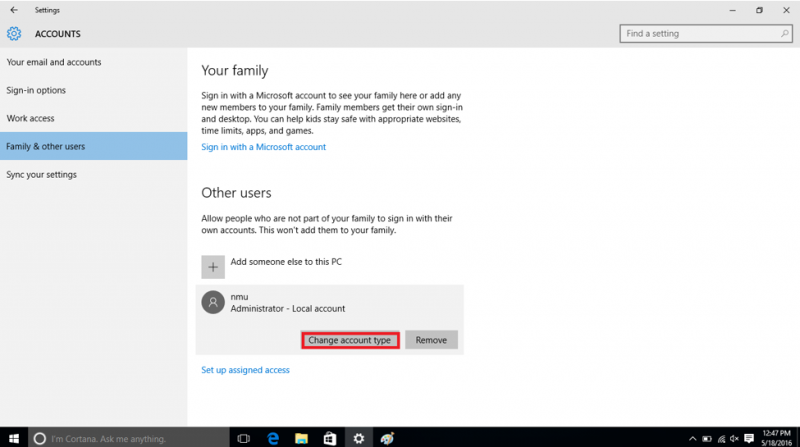
6. To change the account type of an existing account, click the acount you'd like to change and then click "Change account type."
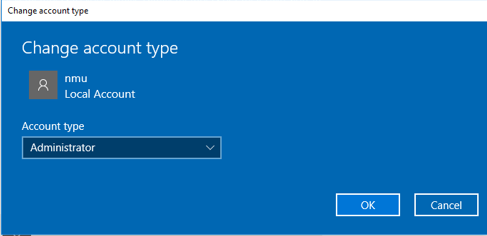
7. A small window will pop up with account types. Selet the preferred type from the drop-down box and click "OK."
Windows 7
1. Select the start button, and select the user account image to open the user account options.
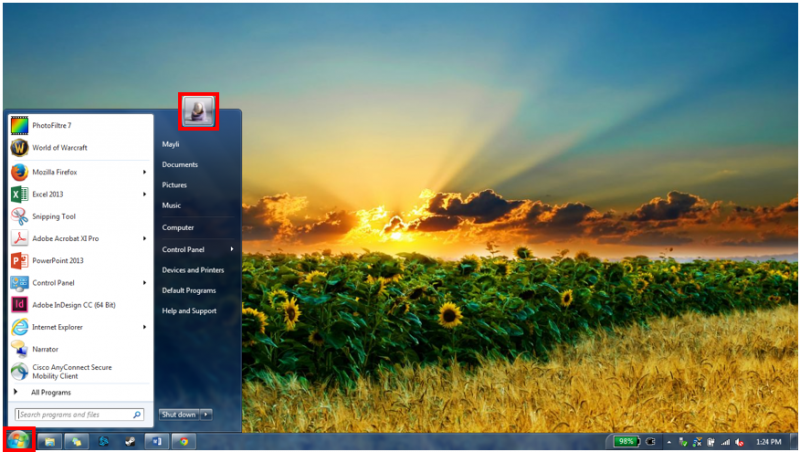
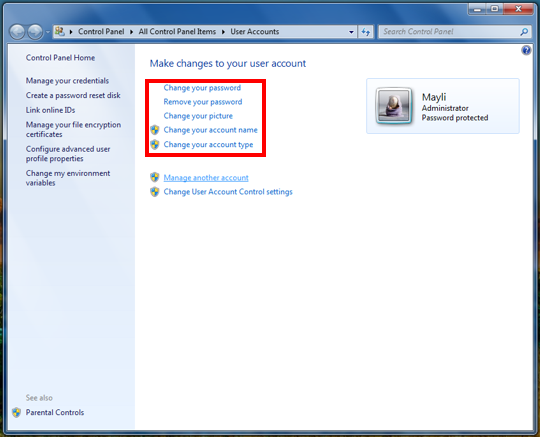
2. If you want to change settings for the current user, choose "Change your password," "Remove your password," "Change your picture," "Change your account name," or "Change your account type."
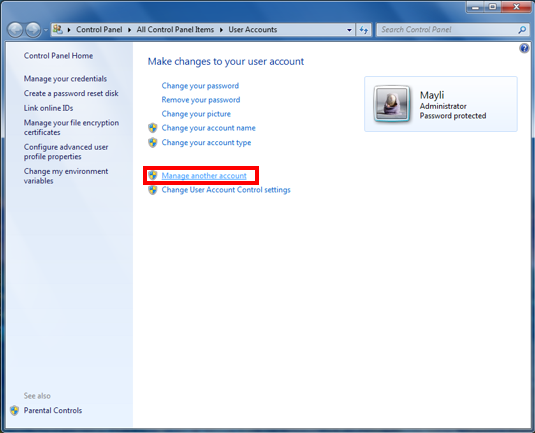
3. If you want to change settings for a different user, select "Manage another account."
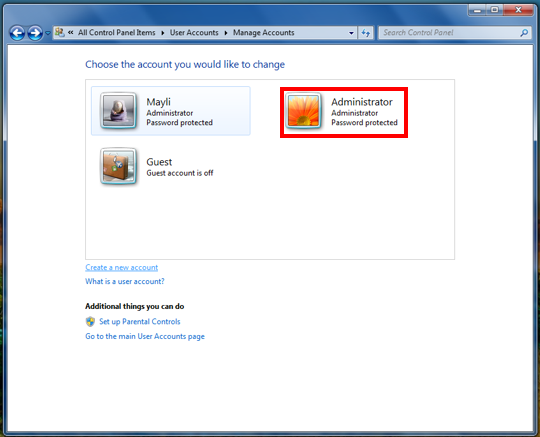
4. Select the account you would like to change .
Change Account Password
1. Once in the user accounts options for the selected user, select "Change your password" (or "add a password" if you have removed your password).
2. Select"Change your password."
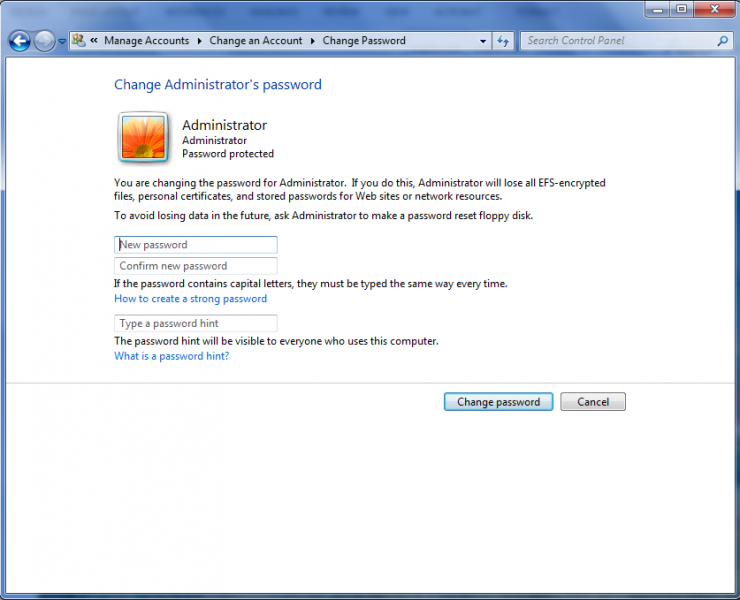
3. Type in the current password (a security measure) and then type in the new password twice.
4. Select"Change Password"to finish.
Change Account Name
1. Once in the account settings for the select user, select "Change the account name."
2. Type in the new account name.
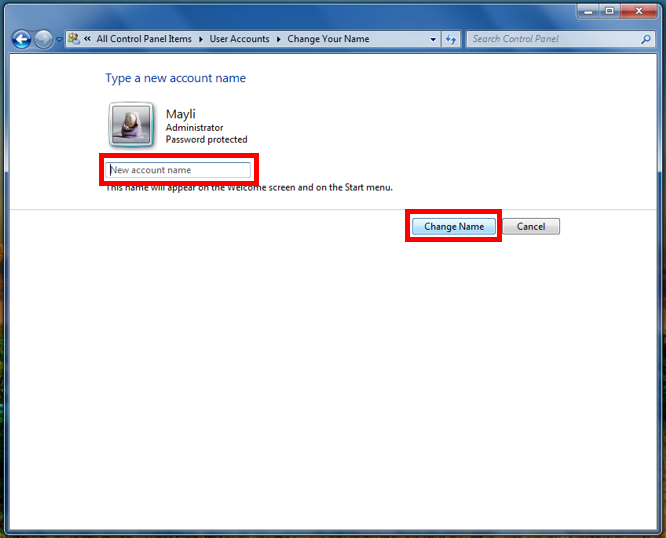
3. Select "Change Name" To finish.
Change Account Type
1. Once in the account settings for the selected user, select "Change the account type."
2. Select "standard" (to limit accessibility to certain features and settings) or "Administrator".
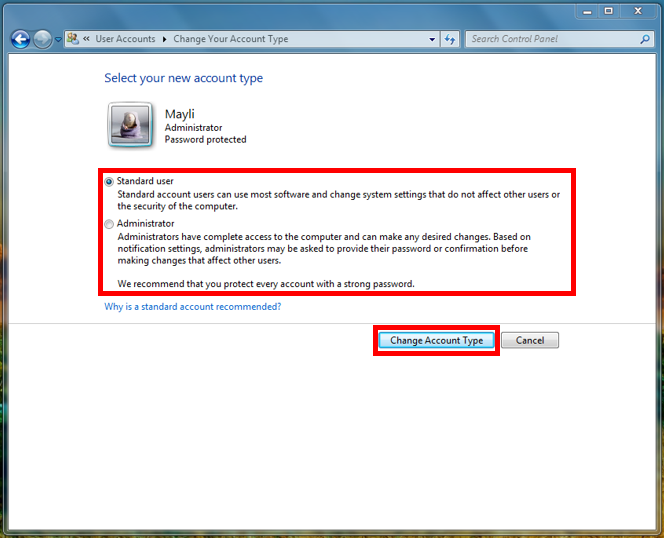
3. Select "Change Account Type" to finish.
Create New Account
1. Select the start button, and select the user account image to open the user account options.

2. Select "Manage another account."

3. Select "Create a new account."
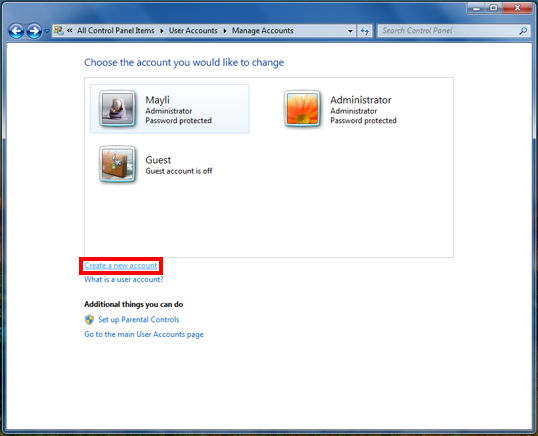
4. Enter in the account name and select the account type.
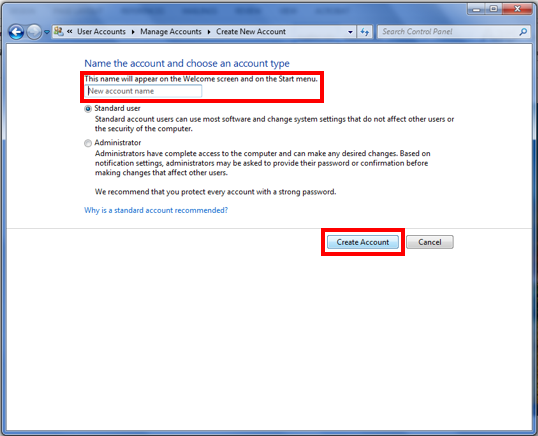
5. Select "Create Account" to finish.
Changing Account Image
You can change the Windows login image with these steps.
- Open the start menu and click on the user account image.
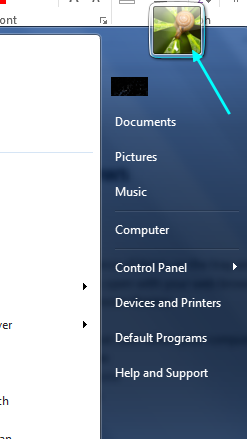
- In the new window that opes, select "Change your Picture."
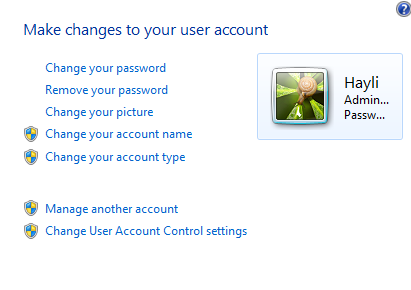
- A new window will open, allowoing you to choose from one of the displayed photos, or browse for a picture on your computer by selecting "Browse for more pictures" and selecting "Open" to select the picture.
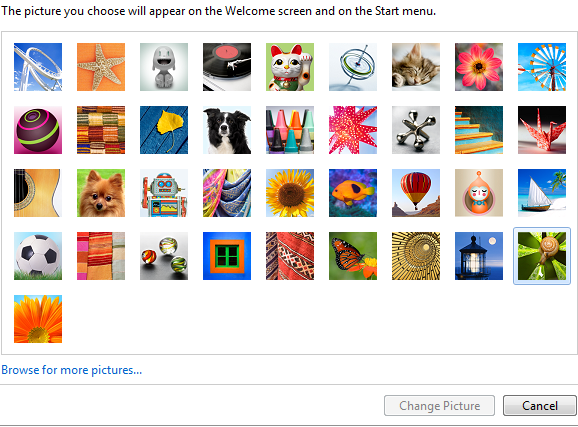
- Select "Change Picture" to make changes.
How to Login to Local Account Windows 7
Source: https://it.nmu.edu/docs/add-or-change-windows-user-account
0 Response to "How to Login to Local Account Windows 7"
Post a Comment