How to Draw Man's Bare Back
For many people who are passionate about drawing, learning how to draw a man is essential.
However, because of its intricate physical features and proportional body structure, drawing a man is understandably very challenging.
To make it easier for you, we have curated a step-by-step tutorial on how to draw a man, summed up in 9 easy and simple steps.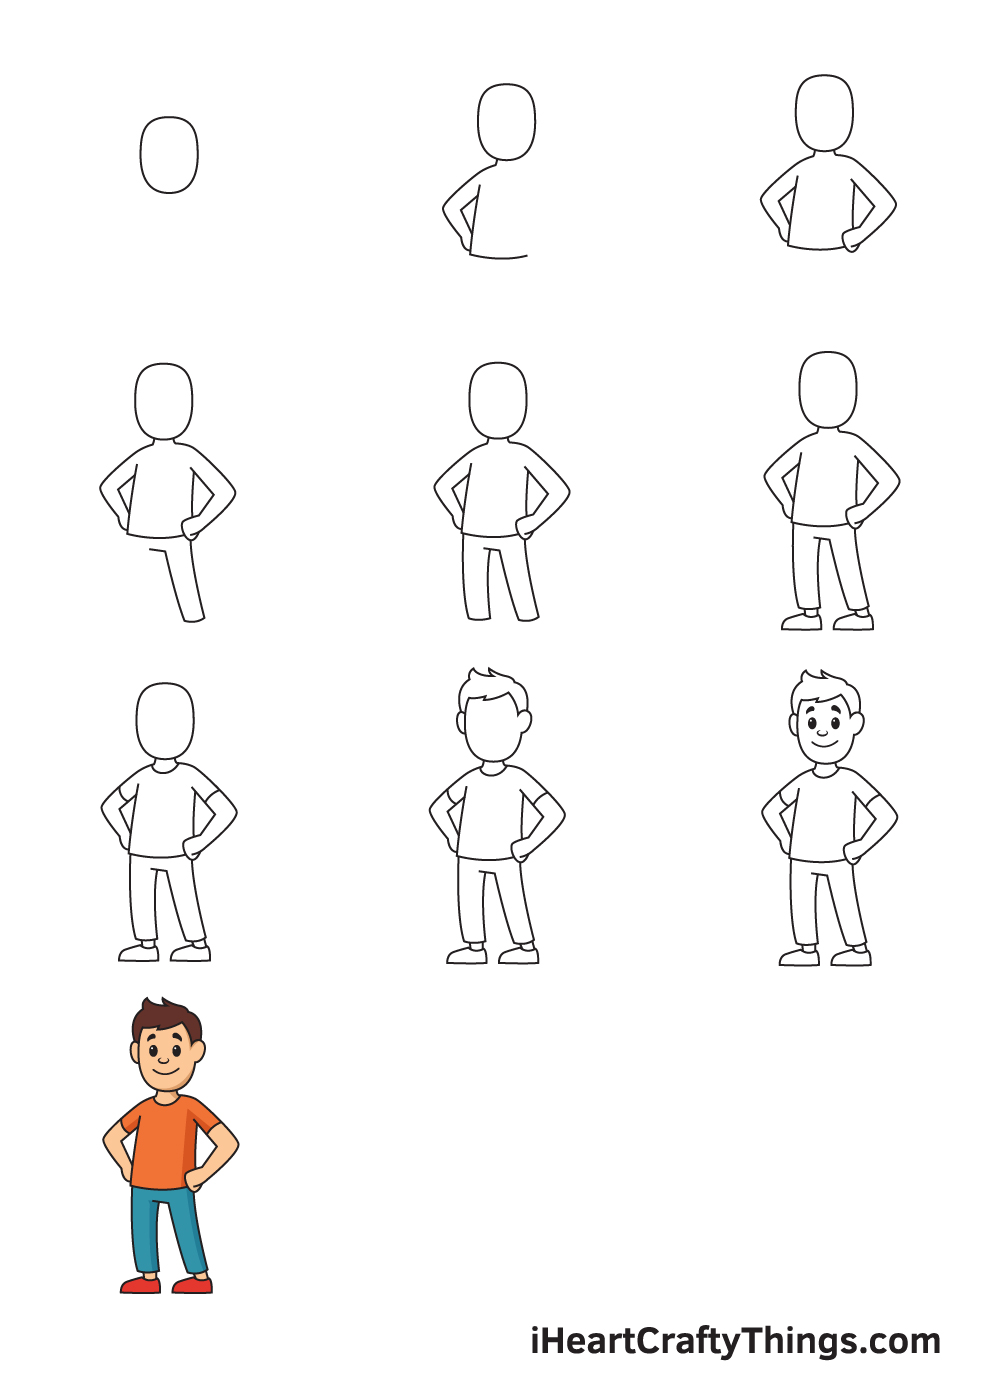
What's more, each detailed instruction comes with an elaborate illustration. Give it a try and you might be surprised to discover that drawing a man is actually a lot easier than you think!
Let's draw a man together!
What's in this Blog Post
- How to Draw a Man — Let's get started!
- Step 1
- Step 2 — Outline the Head and the Torso
- Step 3 — Draw Both Arms Attached to the Body
- Step 4 — Afterwards, Draw the Right Leg
- Step 5 — Now, Complete Drawing Both Legs
- Step 6 — Then, Draw a Pair of Nice Shoes
- Step 7 — Next, Draw the T-Shirt or the Top
- Step 8 — Now, Draw Your Character's Ears and Hair
- Step 9 — Add Facial Features to Finish the Look
- Your Man Drawing is Complete!
How to Draw a Man — Let's get started!
Step 1
On the upper portion of your paper, draw an oval shape to create an outline of the man's head.
The top and bottom part of the oval shape should be slightly straight instead of rounded, as shown in the illustration. However, feel free to draw any shape you prefer for the head!
To make that your character will be drawn in the center, create reference lines by drawing an intersecting horizontal and vertical line across your paper.
The vertical line above the horizontal line is where you should draw the outline of the head. Starting at the upper part of your paper ensures that there is sufficient space for your character's whole body.
Step 2 — Outline the Head and the Torso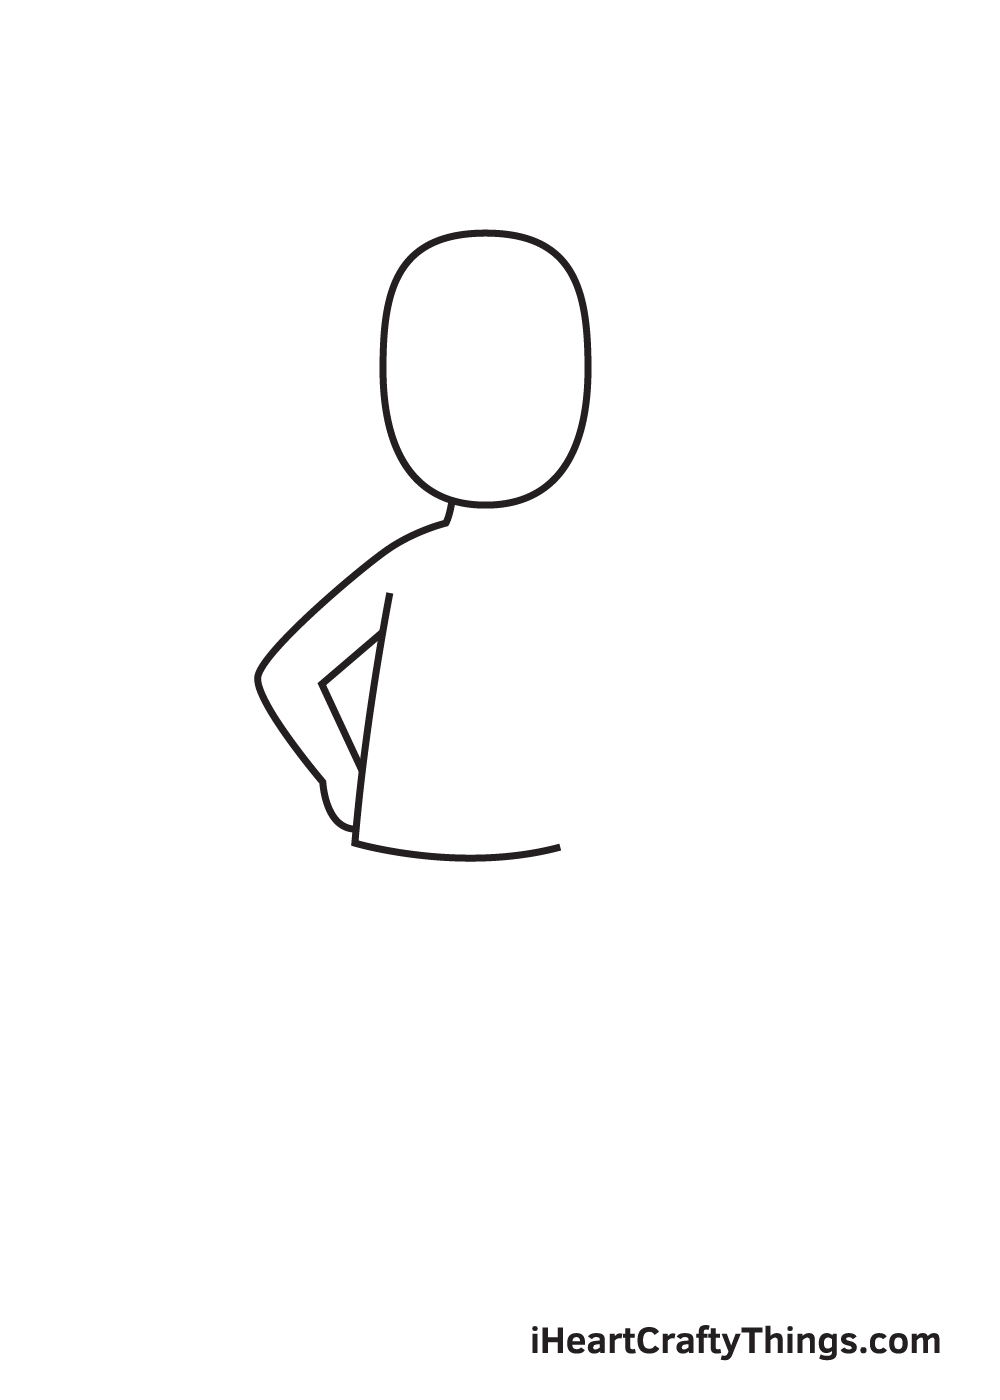
Draw the left side of the torso right underneath the head.
Afterwards, draw parallel angled lines to create the left arm, which should be directly connected to the torso.
Step 3 — Draw Both Arms Attached to the Body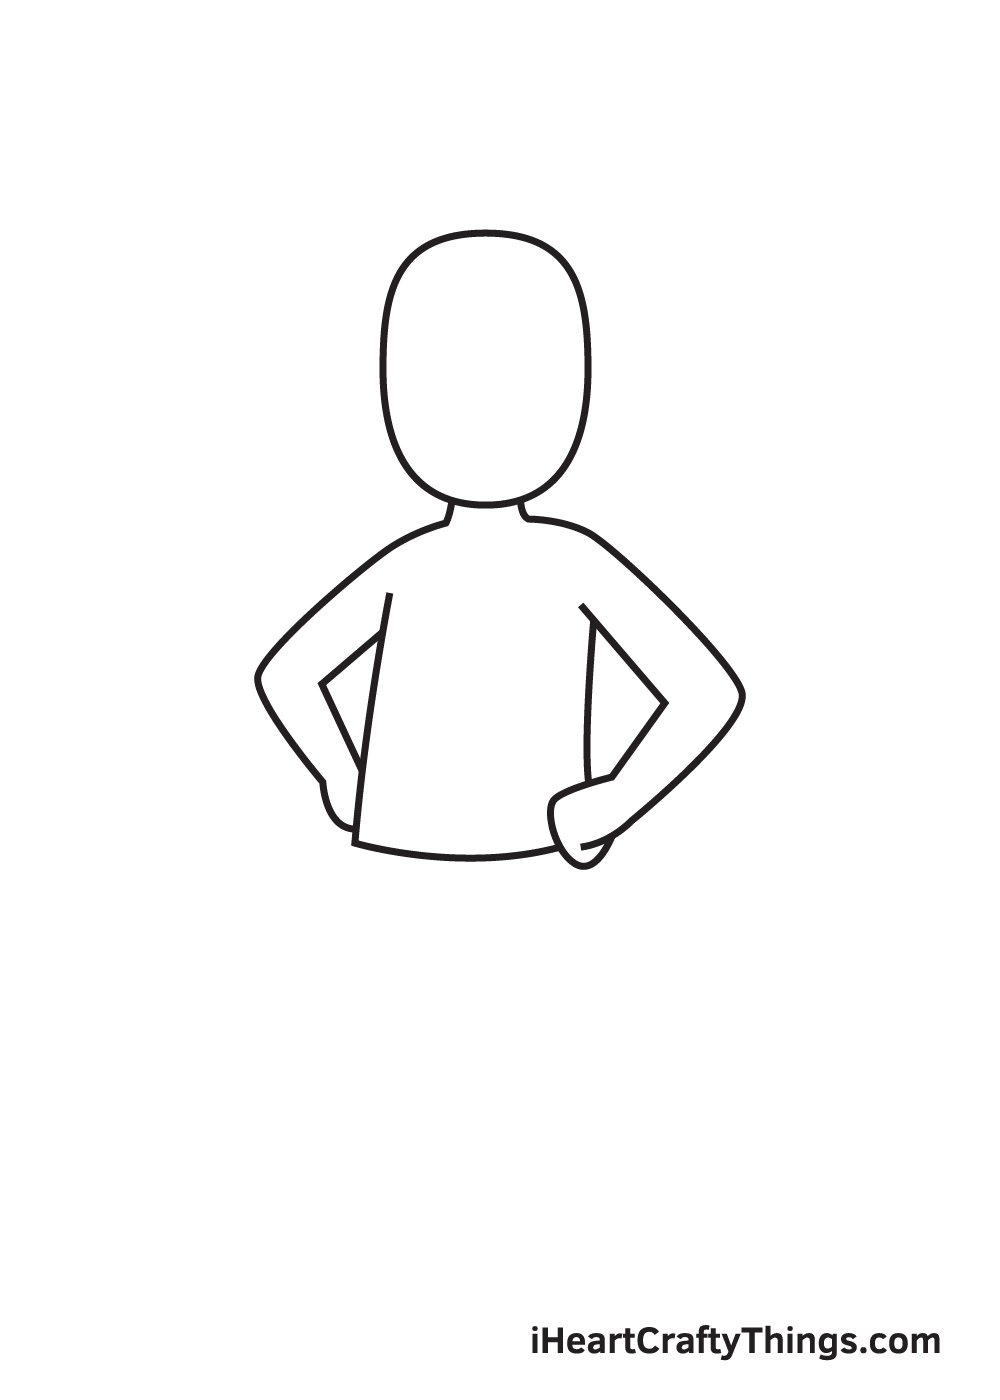
Repeat the previous step on the right side to complete the upper body and the pair of arms.
As you can see in the illustration, the man's arms are folded and both of its hands are resting on its waist.
You can draw the arms of your character in a similar way or draw it however you like. You can draw the arms perfectly still on each side of the torso or draw one arm raised upwards with its hand waving hello.
Step 4 — Afterwards, Draw the Right Leg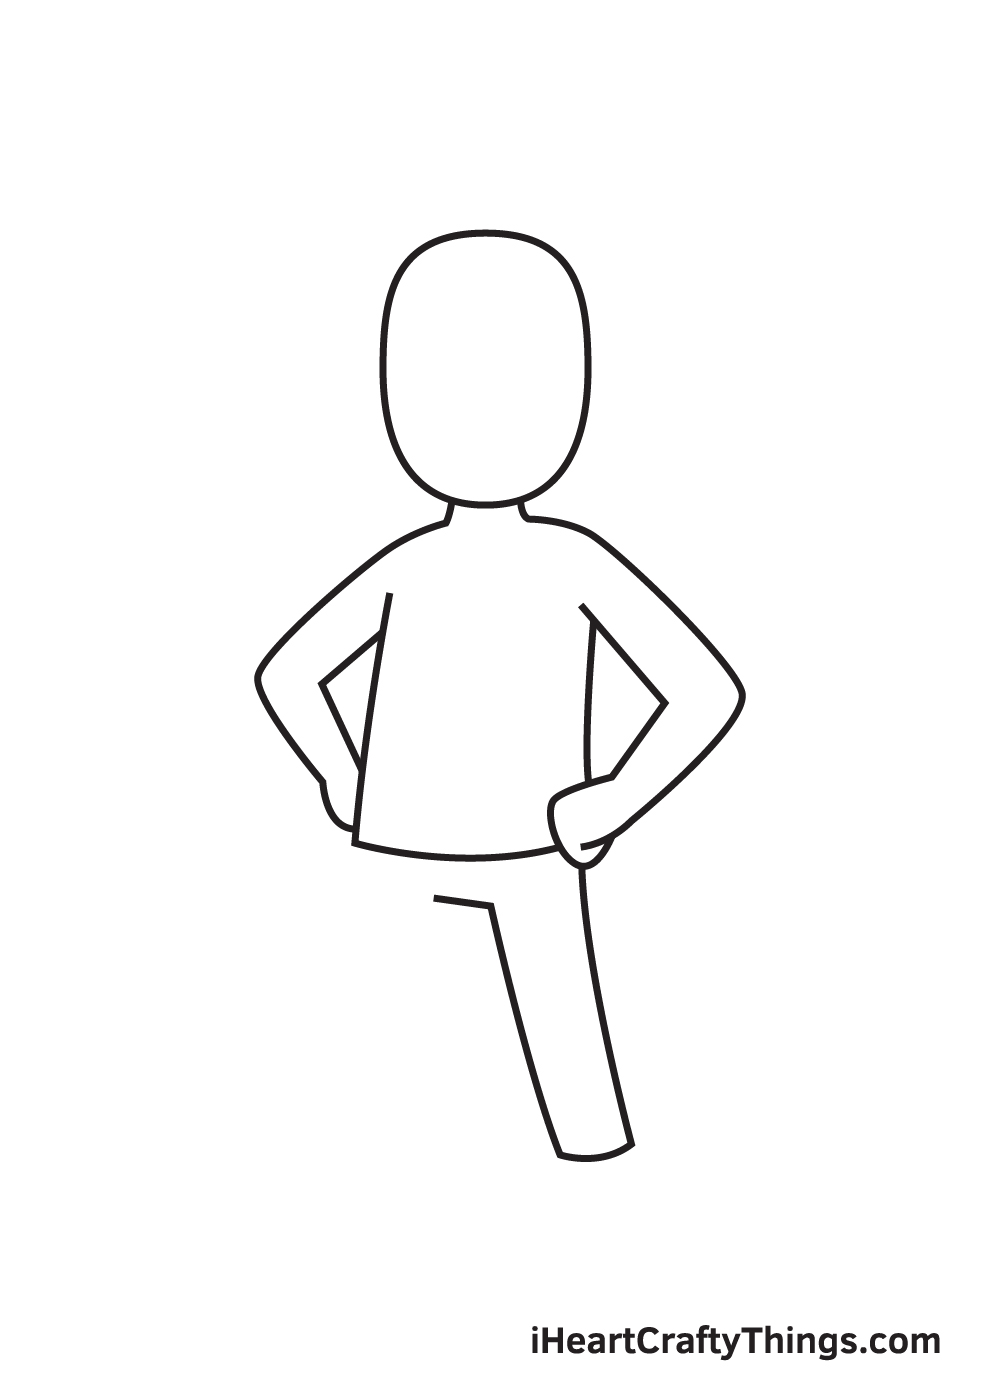
Right underneath the upper body, draw two parallel curved lines forming the right leg. Make sure that the lines are slightly curved outwards to make the structure of the leg appear natural and realistic.
Afterwards, finalize the right leg by drawing a short horizontal line connected to both end points of the parallel vertical line. This outlines one leg of the pants.
Step 5 — Now, Complete Drawing Both Legs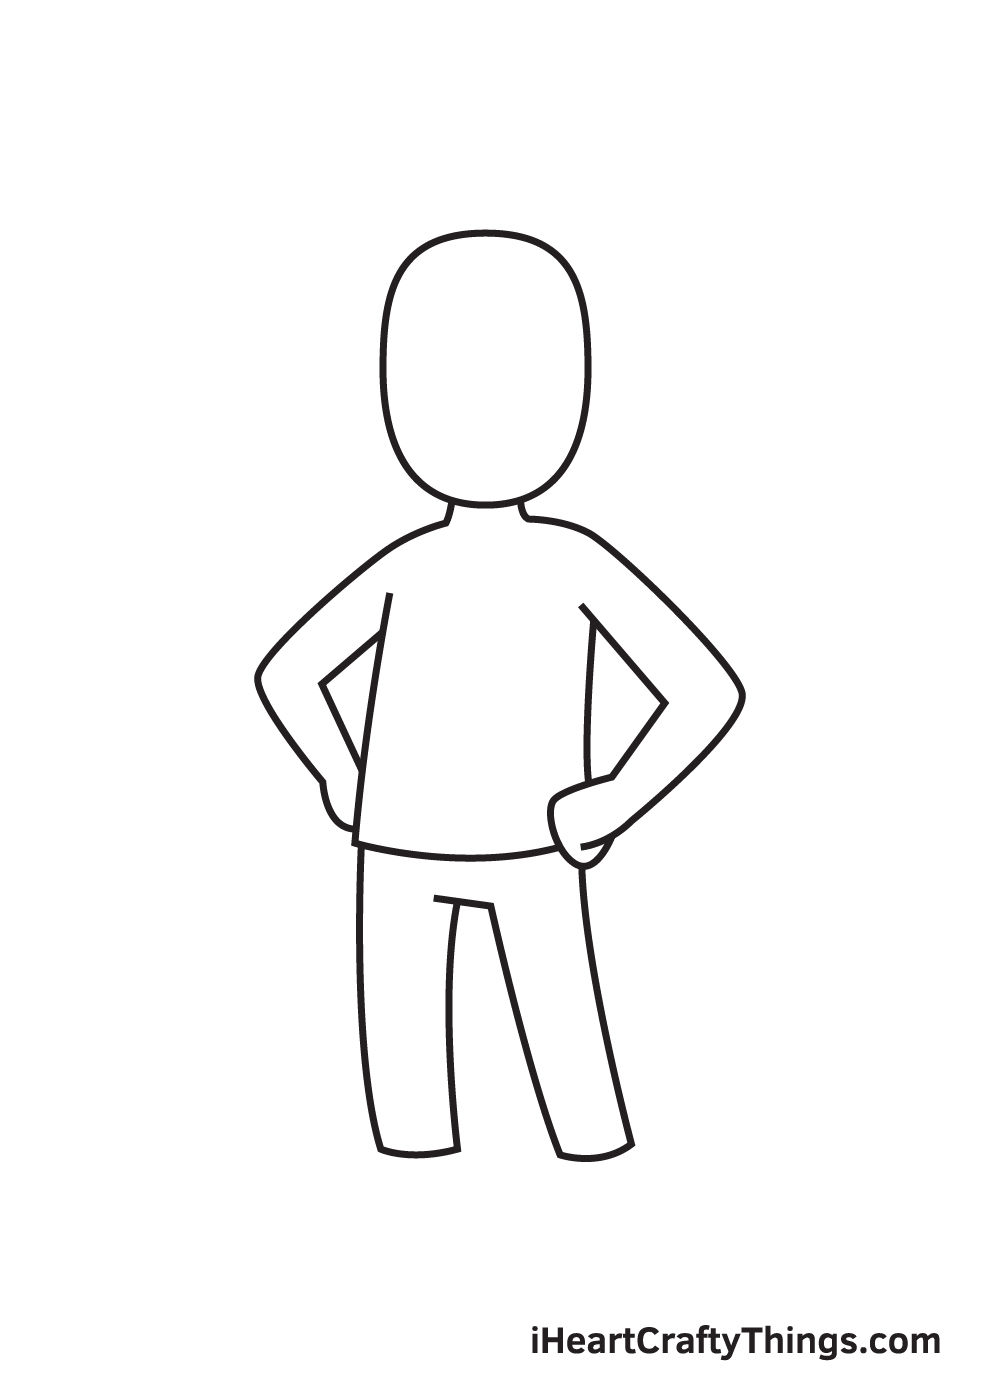
Repeat the previous step on the opposite side to create a pair of pants.
At this point, the lower body of your character should now be complete.
Step 6 — Then, Draw a Pair of Nice Shoes
Draw a pair of shoes right underneath the outline of the pants that we drew in the previous step. Since the man is facing towards the left, the shoes must be facing towards the same direction too!
We think a pair of simple sneakers look great! However, you can draw any kind of shoes you would like your character to wear.
You can also design and style the shoes as much as you like! Feel free to draw patterns on the surface or add some jewels into it. It's all up to you!
Step 7 — Next, Draw the T-Shirt or the Top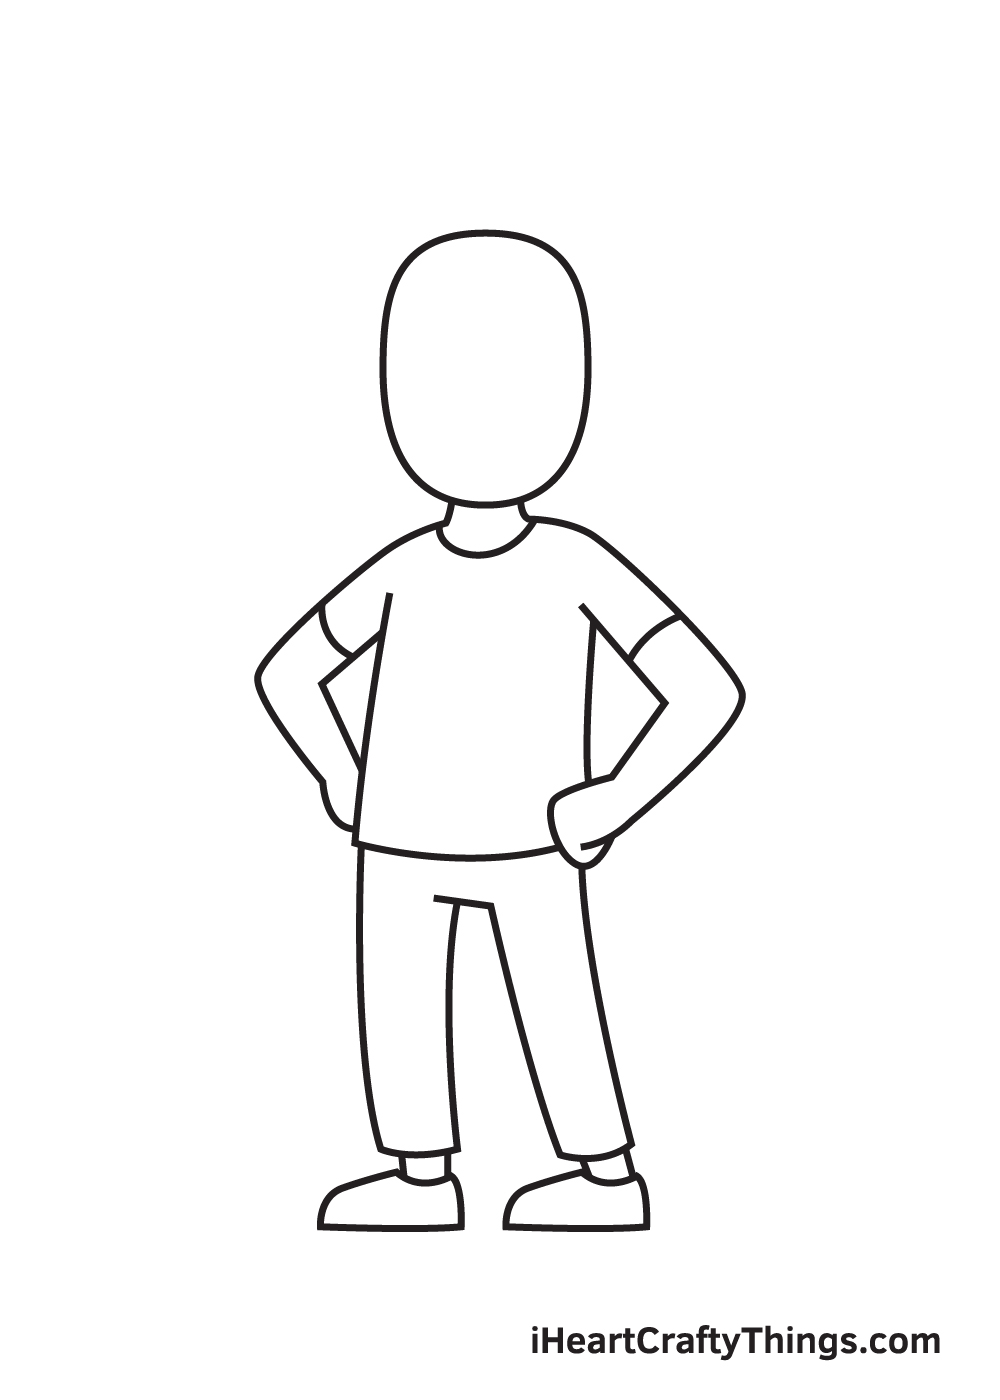
Going back to your character's upper body, draw an upward curved line below its neck to outline the collar of the shirt. Afterwards, draw a line on each bicep to create the hem of the shirt.
And there you have it—your character is now wearing a complete basic outfit!
Step 8 — Now, Draw Your Character's Ears and Hair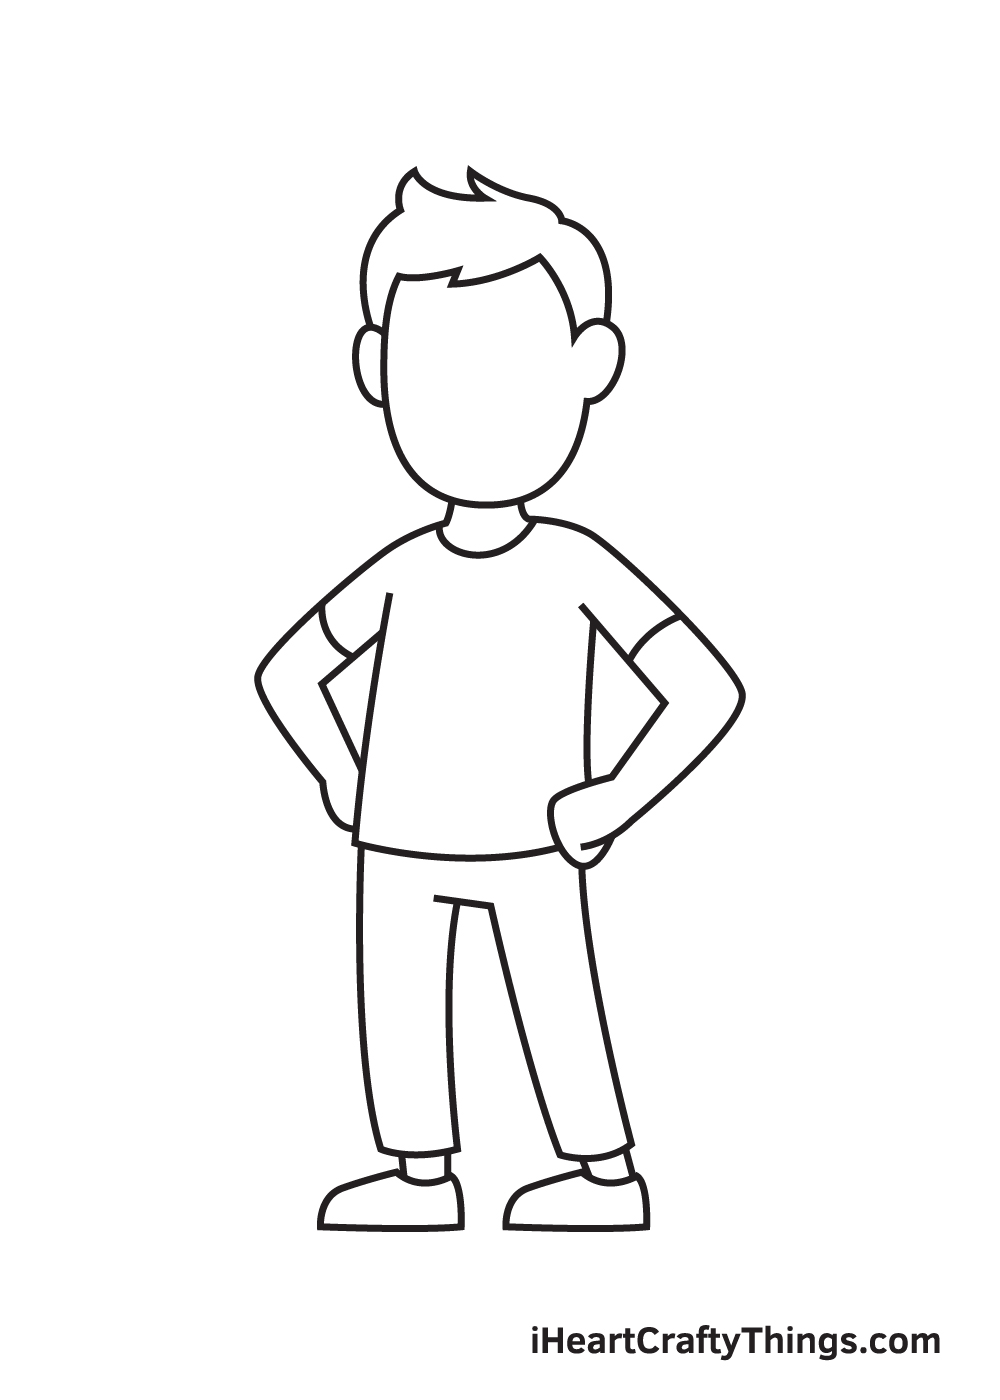
Draw a semicircle on each side of the man's face. This outlines the pair of ears. Remember, since the man is slightly facing towards the left, the left ear shouldn't be as visible as the right ear.
Then, starting from the top of both ears, draw the hairline and the top of the hair. Don't forget to add thick pointed clumps of hair to add texture, making your drawing look more realistic!
As usual, feel free to draw any hairstyle you like!
Step 9 — Add Facial Features to Finish the Look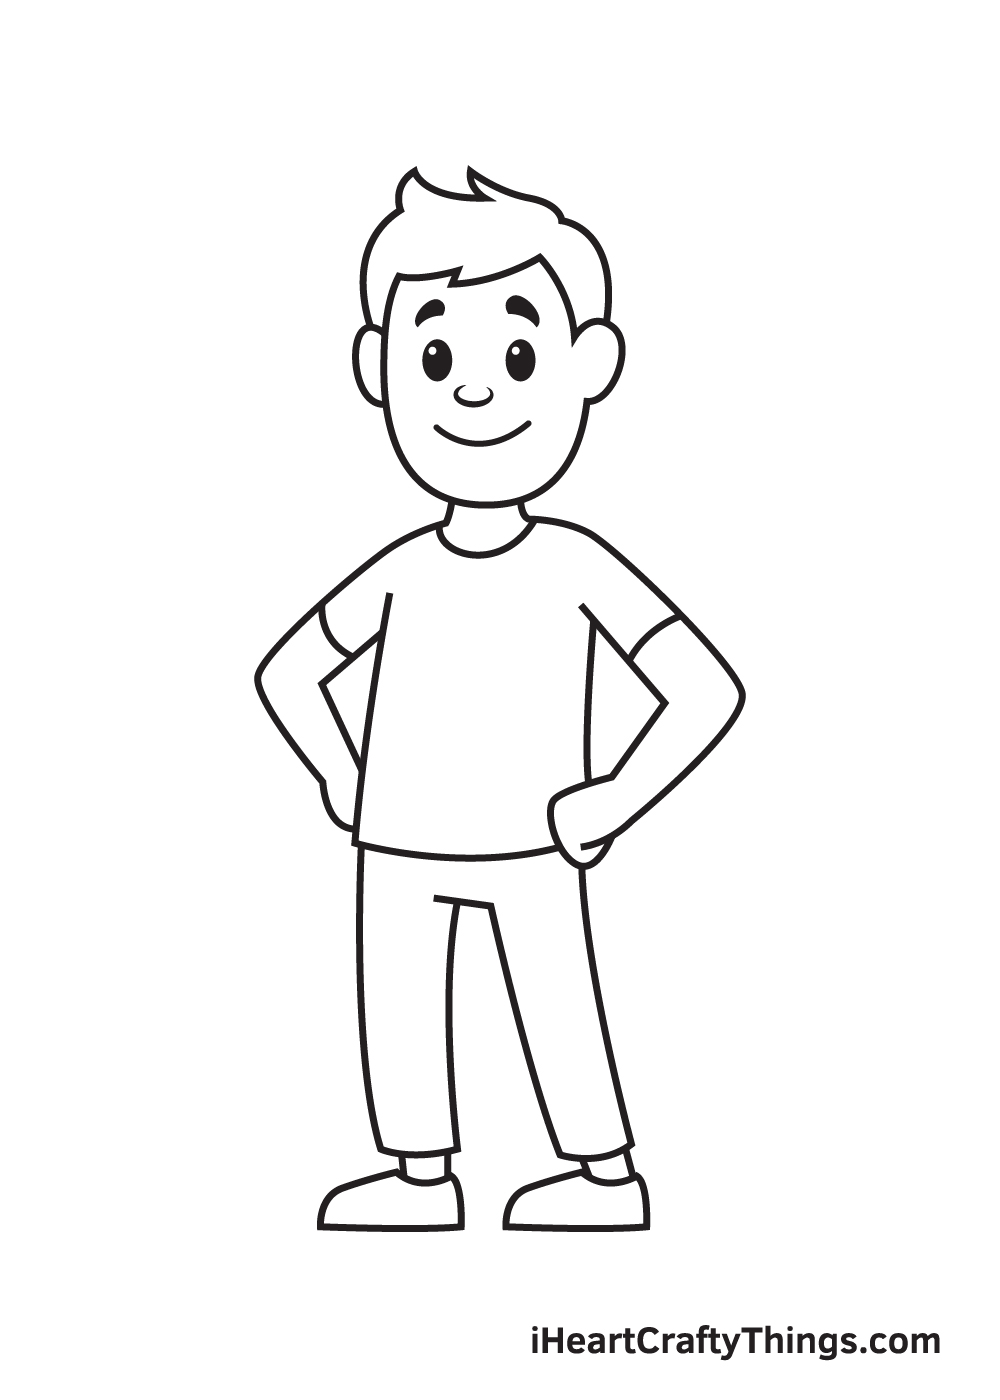
Complete your drawing by adding the facial features. Start by drawing a pair of arched eyebrows.
Men naturally have thicker and fuller eyebrows than women, so make sure to keep that in mind when drawing the eyebrows.
Afterwards, draw two standing oval shapes right underneath each eyebrow. Then, draw a small circle within each eye to highlight the glimmer. Don't forget to shade the entire eyes except for the tiny circle inside! This creates a dramatic "gleaming eyes" effect.
To create the nose and the mouth, simply draw a small upward curved line for the nose and a bigger and wider one for the smile.
At this point, your drawing should now be finished! Now all it's missing is a splash of colors to make your character look dashing. So, let's go ahead and color it!
After completing the man drawing, it's now finally time for the most enjoyable part, which is picking a unique set of colors and coloring your character! In this step, you can showcase your artistic skills as well as your ability to mix and match colors.
Let's start by coloring the skin. To create the skin tone color, combine the colors red, yellow, brown, and white.
Depending on the complexion you're aiming for, you may want to add more of a specific color than the rest.
After coloring to the skin, move on to its hair as well as the clothes your character is wearing. You can opt to color your drawing similar to our illustration or using a unique set of colors.
We definitely recommend doing the latter so you can personalize your drawing and make the most out of your experience.
Have fun playing with colors and watch as your character gradually comes to life!
Your Man Drawing is Complete!
We hope you learned how to draw a man with the help of this step-by-step tutorial. We're sure you can incorporate what you have learned in your future drawings.
Now, you can draw a beautiful natural scenery with a man standing in the middle or perhaps a man swimming in the ocean. The possibilities in drawing are endless once you're capable of drawing a man.
Once you've finished drawing and coloring your artwork, don't forget to show it off by sharing it on our Facebook page and on Pinterest.
Come on, don't be shy! We know how you've worked hard for it so we can already tell that it looks incredible. Be proud of yourself for finishing a masterpiece and let the world appreciate your talent!
We can't wait to see your cool and colorful man drawing!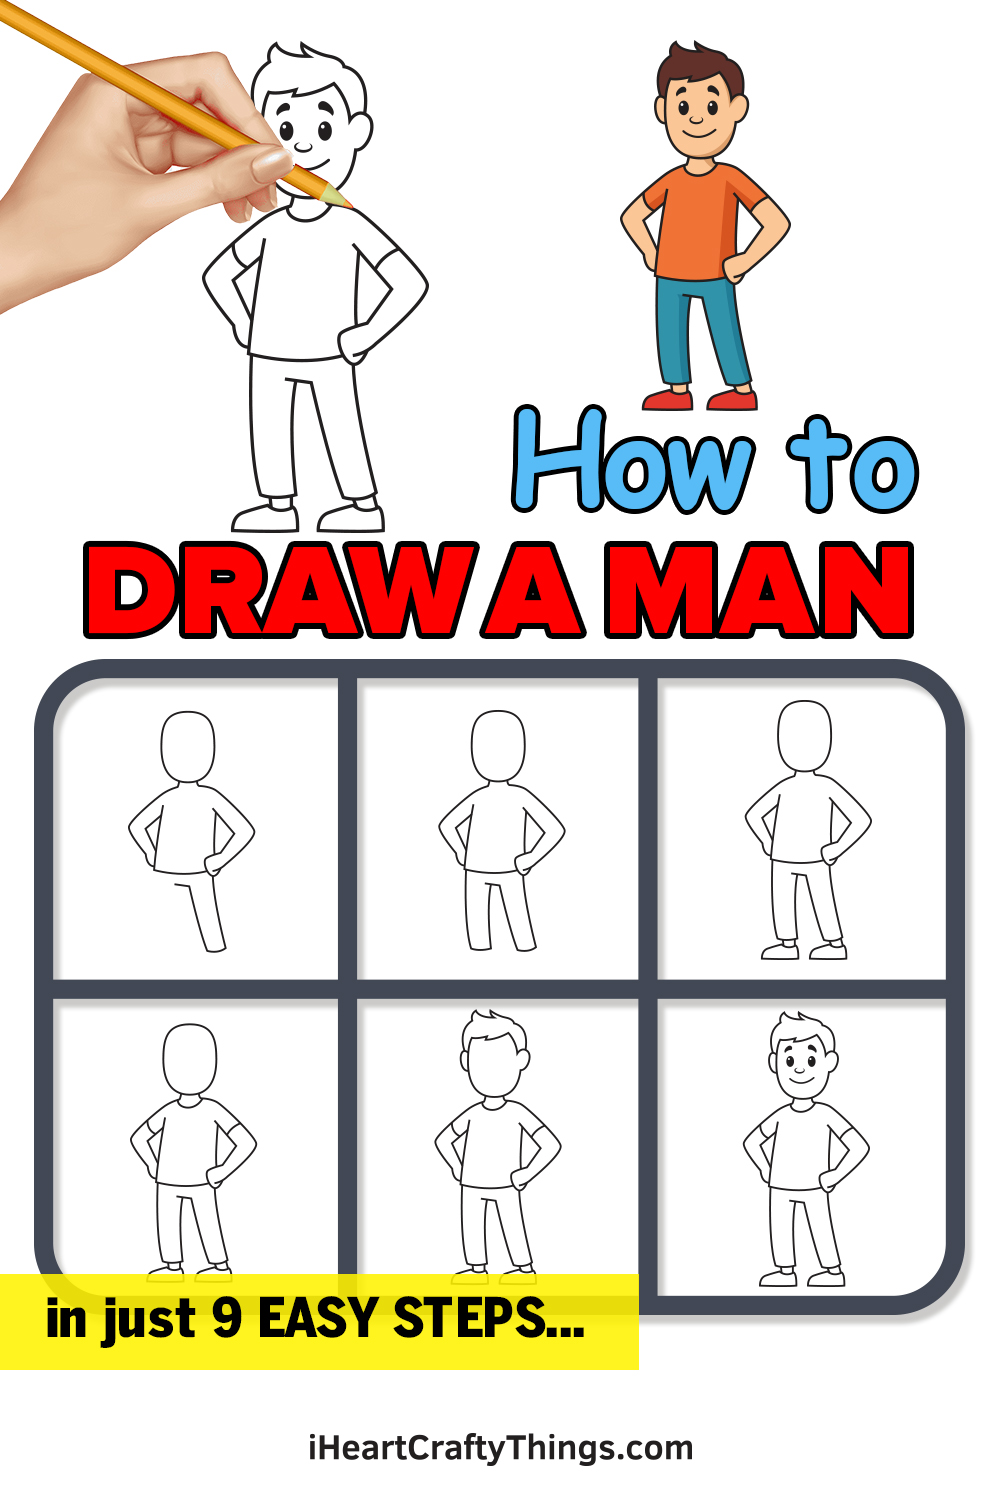
Source: https://iheartcraftythings.com/man-drawing.html
0 Response to "How to Draw Man's Bare Back"
Post a Comment